.png)
.png)


A Step-by-Step Guide: How to Check Engine Mounting in 5 Minutes
Dezembro 26, 2025
Resumo
This article provides a comprehensive examination of the procedures for inspecting automotive engine mountings. It delineates the fundamental role of engine mounts in securing the engine to the vehicle's chassis while simultaneously isolating and damping vibrations to enhance passenger comfort and protect ancillary components. The document systematically outlines the common symptoms indicative of engine mount failure, including excessive vibration, impact noises, and visible engine movement. A detailed, step-by-step methodology for both preliminary and in-depth inspection is presented, emphasizing safety protocols and the correct use of diagnostic tools. The analysis extends to the various types of engine mounts—solid rubber, hydraulic, and active—detailing their unique construction and specific failure modes. The discussion is situated within the broader context of vehicle roadworthiness and operator responsibility, drawing upon established maintenance guidelines to underscore the necessity of using high-quality components and adhering to regular inspection schedules to ensure vehicle safety, longevity, and compliance with regulatory standards.
Principais conclusões
- Listen for distinct clunking or thumping sounds during gear shifts or acceleration.
- Feel for excessive vibrations in the steering wheel, floor, or seats, especially at idle.
- Visually inspect mounts for cracks, rubber degradation, or fluid leakage from hydraulic units.
- Safely learn how to check engine mounting by observing engine movement when shifting gears.
- Use a pry bar cautiously to test for excessive play between the mount's metal and rubber parts.
- A failing mount can cause a domino effect, damaging hoses, wiring, and exhaust components.
- Always prioritize safety by working on a cool engine on level ground with the vehicle secured.
Índice
- Understanding the Unsung Hero: What is an Engine Mounting?
- Reading the Signs: Symptoms of a Failing Engine Mounting
- Preparing for the Inspection: Safety and Tools
- A Deeper Dive: The Comprehensive Guide on How to Check Engine Mounting
- Common Types of Engine Mounts and Their Failure Modes
- The Broader Context: Maintenance, Part Quality, and Roadworthiness
- When to Seek Professional Help
- Perguntas frequentes (FAQ)
- Conclusão
- Referências
Understanding the Unsung Hero: What is an Engine Mounting?
Before we can meaningfully discuss the process of inspection, it is imperative to develop a nuanced understanding of the object of our inquiry. The engine mounting, often referred to simply as an engine mount, is a component whose profound importance is inversely proportional to the attention it typically receives. At its most basic, it is the physical connection that fastens the heavy, vibrating heart of your vehicle—the engine—to the chassis, or frame. Yet, to describe it merely as a bracket would be a gross oversimplification, akin to describing a human heart as just a pump. The engine mount performs a dual role that is both structural and subtle, a task of brute force and delicate finesse.
The Core Function: More Than Just a Bracket
The first and most obvious function is to hold the engine and transmission securely in place. The engine produces immense rotational force, or torque. Every time you accelerate, this torque tries to twist the engine in the opposite direction of the crankshaft's rotation. Without engine mounts, the engine would violently lurch and twist within the engine bay, likely severing fuel lines, coolant hoses, and electrical wiring in the process. The mounts act as anchors, resisting this torque and ensuring the engine's power is transferred smoothly to the wheels rather than being wasted in chaotic movement.
The second, more refined function is that of a vibration isolator and damper. An internal combustion engine is, by its very nature, a source of significant vibration. The controlled explosions happening thousands of time per minute within the cylinders create a constant, palpable tremor. If this vibration were transferred directly to the vehicle's frame, the driving experience would be intolerably harsh. The cabin would buzz, the steering wheel would shake uncontrollably, and the noise would be deafening. Herein lies the genius of the engine mount. It is designed to absorb and dissipate these vibrations. Think of it as a sophisticated filter, allowing the power to pass through while trapping the unwanted "noise" of the engine's operation. It is the silent mediator between the raw power of the engine and the refined comfort of the cabin.
Materials and Design: A Tale of Rubber and Metal
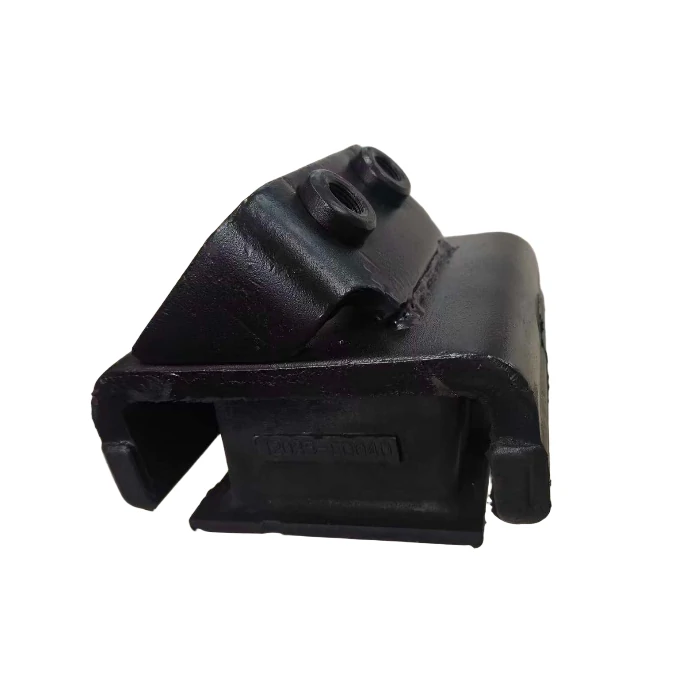
The ability of an engine mount to perform its dual role comes down to its construction. Most mounts consist of a clever combination of metal and a flexible material, typically a specially formulated rubber or elastomer. The metal portions of the mount provide the rigid connection points, one side bolting to the engine block and the other to the vehicle's frame. The rubber section is sandwiched between them, forming the vibration-damping core.
This is not just any rubber. It is an engineered elastomer with a specific durometer, or hardness, chosen to absorb the particular frequency of vibrations produced by a specific engine at various speeds. A rubber that is too soft would allow excessive engine movement, defeating the mount's structural purpose. A rubber that is too hard would transmit too much vibration, failing in its damping role. This delicate balance is a testament to the engineering that goes into what appears to be a simple part. Over the years, this basic design has evolved, leading to several distinct types of mounts, each with its own approach to solving the vibration puzzle. We will explore these different types, from solid rubber to complex hydraulic and active mounts, in a later section.
The Domino Effect: Why a Failed Mount is a Systemic Problem
Understanding the function of an engine mount naturally leads to the question of what happens when it fails. A compromised engine mount is not an isolated issue; it is the beginning of a potential cascade of failures throughout the vehicle. When a mount can no longer properly secure the engine or absorb its vibrations, a series of negative consequences begins.
First, the excessive movement of the engine places immense strain on other connected components. Coolant hoses are stretched and flexed beyond their design limits, leading to premature cracks and leaks. Electrical wiring harnesses can be chafed or pulled apart, causing intermittent or total electrical failures. The flexible joints in the exhaust system can be fractured by the constant, violent motion, resulting in exhaust leaks. Even the transmission's gear selector linkage can be affected, making shifting difficult or imprecise.
Second, the increased vibration is not just a comfort issue. It accelerates wear and tear on countless other parts of the vehicle. The constant shaking can fatigue metal brackets, loosen bolts, and damage sensitive electronic sensors. The entire vehicle is subjected to a level of stress it was never designed to handle. Therefore, learning how to check engine mounting is not merely about addressing a noise or a vibration; it is a fundamental aspect of preventative maintenance that protects the integrity of the whole vehicle system. A single failing mount, left unaddressed, can precipitate a series of much more expensive and complex repairs down the line.
Reading the Signs: Symptoms of a Failing Engine Mounting
A vehicle often communicates its ailments through a language of sounds, sensations, and visual cues. A failing engine mount is no exception. Learning to interpret these symptoms is the first step in diagnosing the problem. These signs can be subtle at first, but they will invariably grow more pronounced as the mount deteriorates. Paying close attention to changes in your vehicle's behavior is key.
Auditory Clues: The Language of Clunks and Thumps
The most common and often the first noticeable symptom of a bad engine mount is noise. These are not typically continuous sounds but rather distinct, impact-like noises that occur under specific conditions.
- Clunking or Banging on Acceleration/Deceleration: When a mount has failed, the engine has excessive room to move. As you accelerate, the engine torques back and, if the mount is broken, can lift or shift until it makes forceful contact with another part of the frame or a nearby component. This results in a solid "clunk" or "bang." You may hear a similar noise when you let off the accelerator suddenly, as the engine shifts in the other direction.
- Noise When Shifting Gears: In a vehicle with an automatic transmission, you might hear a distinct clunk as you shift from Park to Drive or from Park to Reverse. This is the moment the transmission engages and applies a load to the engine, causing it to shift abruptly against the failed mount.
- Impact Noises Over Bumps: While driving over rough roads or speed bumps, the entire engine and transmission assembly can be jostled. A broken mount allows this heavy assembly to move excessively, creating banging noises as it hits its limits of travel.
Tactile Feedback: Feeling the Vibrations
The other primary role of an engine mount is to absorb vibration. When it fails, that vibration is no longer isolated from the chassis and, by extension, from you, the driver.
- Vibração excessiva em marcha lenta: This is a classic symptom. You may notice a new or significantly increased vibration through the steering wheel, the floorboards, or the seats while the car is stopped but the engine is running (for example, at a traffic light). The vibration may feel rough and uneven.
- Vibration That Changes with Engine Speed: The vibration might smooth out as you accelerate and the engine RPM increases, or it might get worse within a specific RPM range where the failing mount is no longer able to damp the engine's natural frequency.
- A General Sense of Roughness: The vehicle may simply feel less "solid" or "smooth" than it used to. This can be a subjective feeling, but it is often the first clue that something has changed in the relationship between the engine and the chassis.
Visual Evidence: What Your Eyes Can Tell You
In some cases, the evidence of a failed mount is plain to see, even before you begin a formal inspection.
- A Shifting Engine: With the hood open, you might be able to see the engine move or lurch significantly when a helper shifts the car between Drive and Reverse (with the parking brake firmly applied and their foot on the brake pedal). A small amount of movement is normal, but a jump of more than an inch or so is a clear red flag.
- Motor Sag: In severe cases, a completely collapsed mount can cause the engine to visibly sag or tilt to one side. This can create alignment issues with other components, such as the cooling fan hitting the radiator shroud.
The table below summarizes these symptoms to aid in preliminary diagnosis.
| Sintoma | Descrição | Likely Cause |
|---|---|---|
| Impact Noise | A "clunk" or "bang" during acceleration, deceleration, or gear shifting. | The engine is moving excessively and hitting the frame or other components due to a broken or separated mount. |
| Vibração excessiva | A noticeable increase in vibration felt in the cabin, especially at idle. | The mount's rubber has hardened, cracked, or collapsed, and is no longer absorbing engine vibrations. |
| Visible Movement | The engine can be seen lurching or jumping more than an inch in the engine bay. | Complete failure of the mount's rubber element, allowing free movement of the engine. |
| Fuga de fluido | Oily residue or drips on or below a mount (hydraulic types only). | The internal fluid-filled bladder of a hydraulic mount has ruptured, eliminating its damping properties. |
Recognizing these signs early and taking action is paramount. It is the difference between a straightforward part replacement and a cascade of more severe mechanical problems.
Preparing for the Inspection: Safety and Tools
Approaching any task involving a vehicle's mechanical systems demands a methodical and safety-conscious mindset. The engine is the heaviest single component in most vehicles, and the forces involved are not to be underestimated. Before you even think about how to check engine mounting, you must first establish a safe working environment. This is non-negotiable.
Your Safety-First Checklist
Adherence to a strict safety protocol is the hallmark of a professional approach, whether you are a seasoned mechanic or a weekend enthusiast. Take a moment to work through these steps before you begin.
- Find a Level Surface: Never work on a vehicle that is parked on an incline. The risk of it rolling or a jack slipping is far too great. A flat, level driveway or garage floor is the only acceptable location.
- Ensure the Engine is Cool: The engine and exhaust components can reach extremely high temperatures, capable of causing severe burns. Allow the vehicle to sit for at least an hour, and preferably longer, before beginning your inspection.
- Secure the Vehicle: Engage the parking brake firmly. If you have an automatic transmission, place it in Park. For a manual transmission, put it in first gear or reverse.
- Calço as rodas: Place wheel chocks securely behind the rear wheels (or the wheels that will remain on the ground if you are jacking up the vehicle). This provides a critical layer of redundancy against rolling.
- Gather Your Protective Gear: Safety glasses are essential to protect your eyes from falling debris or dirt. A pair of mechanic's gloves will protect your hands from scrapes, cuts, and grime.
- Ensure Adequate Lighting: A dark engine bay is a difficult place to work. A good quality flashlight or a headlamp is indispensable for a thorough visual inspection.
Assembling Your Diagnostic Toolkit
You do not need an entire workshop full of specialized equipment to perform a competent engine mount inspection. A few basic hand tools will suffice for a comprehensive diagnosis.
- Flashlight: As mentioned, a bright, reliable light source is your most important diagnostic tool. An LED headlamp is particularly useful as it frees up both of your hands.
- Barra de furar: A medium-length pry bar (around 18-24 inches) is used to apply leverage to the engine and check for movement in the mounts. It is important to use this tool with care to avoid damaging other components.
- Macacos de chão e suportes para macacos: While not always necessary for a purely visual inspection, a floor jack and a set of appropriately rated jack stands are required if you need to get under the vehicle or if you plan to perform the more advanced check of slightly lifting the engine. Never, under any circumstances, get under a vehicle that is supported only by a jack. Always use jack stands.
- Block of Wood: If you intend to use a jack to lift the engine, you will need a small block of wood (e.g., a 4×4 inch piece) to place between the jack and the oil pan. This distributes the load and prevents the jack from denting or puncturing the oil pan.
- Basic Socket/Wrench Set: While you may not be removing any parts, having a basic set of wrenches or sockets can be useful for checking the tightness of the mount's own fastening bolts, which can sometimes come loose.
Having these items prepared and within reach before you start allows you to work efficiently and without interruption, maintaining your focus on the task at hand. This preparation is not a preliminary step to be rushed; it is an integral part of the inspection process itself, setting the stage for a safe and successful diagnosis.
A Deeper Dive: The Comprehensive Guide on How to Check Engine Mounting
With a safe environment established and your tools at the ready, you can now proceed with the inspection. We will approach this systematically, moving from the simplest visual checks to more hands-on methods. Remember to be methodical and patient. The goal is to gather clear evidence to make an informed diagnosis.
Locating the Mounts: A Vehicle-Specific Map
The first challenge is simply finding the mounts. Their number and location vary depending on the vehicle's drivetrain layout and the engine's design. Typically, a vehicle will have between three and five mounts in total, including the transmission mount.
- Front-Wheel Drive (FWD) Vehicles: In a typical FWD car with a transverse-mounted engine (where the engine sits sideways in the engine bay), you will usually find one mount near the top of the engine on the passenger side (often called a "dog bone" or torque strut), another mount under the radiator, and a third mount that is actually the transmission mount, located on the driver's side.
- Rear-Wheel Drive (RWD) Vehicles: In RWD trucks and cars with a longitudinally-mounted engine (where the engine sits front-to-back), the layout is more standardized. There are typically two main engine mounts, one on each side of the engine block, situated low down and connecting to the frame rails. There will also be a single transmission mount at the rear of the transmission, supporting the back of the entire powertrain assembly.
- All-Wheel Drive (AWD) Vehicles: These can be more complex and may combine elements of both FWD and RWD layouts, often having additional mounts or subframes.
Your vehicle's service manual is the best resource for a precise map of your mount locations. However, a general search for them involves looking for the points where large, rubber-and-metal assemblies connect the engine/transmission to the vehicle's frame or subframe.
The Engine Torque Test: A Dynamic Visual Check
This is one of the most effective ways to spot a failed mount and can often be done without any tools. It requires a helper.
- Positioning: Have your helper sit in the driver's seat. You will stand safely to the side of the vehicle, viewing the engine bay. Ensure you are not leaning over the engine.
- Firm Brakes: Instruct your helper to start the engine, press their foot firmly on the brake pedal, and keep it there throughout the test.
- Shifting the Load: Ask the helper to shift the transmission into Drive. Watch the engine closely. Does it lift or lurch violently?
- Reverse the Load: Next, have them shift into Reverse. Again, watch the engine. It will try to twist in the opposite direction.
- Observation: A healthy set of mounts will allow only a small amount of movement, perhaps half an inch to an inch of smooth, controlled flex. A failed mount will reveal itself through a much larger, more abrupt jump or lurch of the engine. If the engine lifts several inches or slams back and forth, you have almost certainly found a problem. This test is particularly good for identifying a completely broken or separated mount.
Detailed Visual Inspection: Beyond the Surface
Now it is time to use your flashlight and get a close-up look at each individual mount. This requires careful observation.
- Look for Cracks: Examine the rubber portions of the mount from all accessible angles. Look for deep cracks, splits, or fissures. Small, superficial surface cracks might be a sign of age, but deep cracks that go all the way through the rubber indicate the mount is failing.
- Check for Separation: Pay close attention to the areas where the rubber is bonded to the metal parts of the mount. Is the rubber pulling away or completely separated from the metal? This is a definitive sign of failure.
- Inspect for Leaks (Hydraulic Mounts): If your vehicle is equipped with hydraulic (hydro) mounts, look for any signs of fluid leakage. These mounts are filled with a thick, dark fluid. If one has failed, you will often see a dark, oily residue on the mount itself or on the frame directly beneath it. A leaking hydro-mount has lost all its special damping properties and must be replaced.
- Look for Collapse: Compare the mounts on either side of the engine (if applicable). Does one side look like it is sagging or compressed more than the other? A collapsed mount will often have its metal parts sitting much closer together than a healthy one, or they may even be touching.
- Check for Shiny Spots: Look for areas on the engine or frame near the mount that are unusually clean or shiny. This can indicate where the engine has been making contact during its excessive movement, rubbing away the dirt and grime.
This visual inspection is a critical part of the process, as it directly relates to the vehicle's roadworthiness. The UK's Driver and Vehicle Standards Agency (2025) emphasizes in its guide that every part of a vehicle must be "maintained in good and efficient working order." A cracked, separated, or collapsed engine mount clearly fails to meet this legal standard.
The Pry Bar Method: Assessing Movement Under Load
A visual inspection might not always reveal the extent of the problem, especially if the rubber has become weak but is not yet visibly broken. The pry bar allows you to simulate the forces the engine exerts on the mounts. This must be done with caution.
- Find a Safe Fulcrum: Position the tip of the pry bar on a solid part of the engine block or a strong bracket attached to it. Place the shaft of the bar against a very sturdy part of the vehicle's frame or subframe to act as a pivot point (fulcrum). Never pry against fragile components like fuel lines, brake lines, wiring, or the A/C compressor.
- Apply Gentle, Firm Pressure: Use the pry bar to gently try to lift or shift the engine. You are not trying to move it a great distance, but rather to feel for play in the mount.
- Interpret the Movement: A good mount will feel firm and resistant, allowing only a very slight amount of flex. A bad mount will feel "mushy" or will allow for significant movement (e.g., more than a quarter-inch of play) before it resists. You might see the rubber stretch excessively or hear a clunk as the internal parts of the mount make contact.
- Test in Multiple Directions: Try to pry in different directions (up, down, side-to-side) to check the mount's integrity from all angles. Repeat this process for each of the engine and transmission mounts.
This method provides tactile feedback that a purely visual inspection cannot. It helps you find mounts that have lost their structural integrity even if they look intact at first glance.
Jacking the Engine: A Controlled Lift
This is a more advanced technique and should only be performed if you are comfortable and have the correct equipment. It is particularly useful for checking for separation that is not visible from the top.
- Posicionar o macaco: Place the block of wood on the saddle of your floor jack. Roll the jack under the engine and position the wood block directly under the center of the engine's oil pan. The wood is crucial to spread the load and prevent damage.
- Apply Lifting Force Slowly: Very slowly and carefully, begin to pump the jack. You are not trying to lift the entire front of the car. You are only trying to take the weight of the engine off the mounts.
- Observe the Mounts: As you apply just enough pressure to slightly lift the engine, watch the engine mounts very closely.
- If a mount is separated, you will see a gap open up between the rubber and the metal bracket it is supposed to be attached to. The engine side of the mount will lift, but the frame side will stay put.
- This is the most definitive test for a separated mount, as the weight of the engine can sometimes hold a broken mount together, hiding the damage during a normal visual inspection.
- Lower and Remove: Once you have made your observation, slowly and carefully lower the jack and remove it from under the vehicle.
By following this comprehensive process, you move from general symptoms to specific, verifiable evidence. This methodical approach is the best way to confidently determine the health of your vehicle's engine mounts and make an informed decision about any necessary repairs.
Common Types of Engine Mounts and Their Failure Modes
The world of engine mounts is more diverse than one might initially suspect. Engineers have developed various designs to tackle the challenge of securing an engine while isolating its vibrations, each with its own set of strengths and weaknesses. Understanding these types is key to recognizing their specific failure modes.
Solid Rubber Mounts: The Workhorse
This is the most traditional and straightforward design. It consists of blocks of solid, engineered rubber bonded between two metal plates or brackets.
- How They Work: Their function is simple. The metal provides the rigid attachment points, and the bulk of the rubber provides both the structural support and the vibration damping. Their effectiveness is entirely dependent on the specific size, shape, and durometer (hardness) of the rubber.
- Common Applications: They are frequently found in older vehicles, heavy-duty trucks, and performance cars where a firm connection is prioritized over ultimate comfort.
- Failure Modes: Solid rubber mounts are durable but not invincible. Their most common failures are due to age and environmental exposure.
- Cracking and Perishing: Over time, the rubber dries out, becomes brittle, and develops deep cracks. This compromises its ability to both support the engine and damp vibrations.
- Collapse: The constant weight and vibration can cause the rubber to lose its shape and compress, a condition known as "setting" or collapse. The mount sags, allowing the engine to sit lower than it should.
- Separação: The bond between the rubber and the metal plates can fail, causing the two parts to delaminate. This results in a complete loss of engine control.
Hydraulic (Hydro) Mounts: The Smooth Operator
As manufacturers sought to improve cabin comfort and reduce noise, vibration, and harshness (NVH), the hydraulic mount was developed. It looks similar to a solid mount but contains a hidden, sophisticated mechanism.
- How They Work: A hydro-mount is a hollow rubber mount filled with a glycol-based or hydraulic fluid. Inside, there are two chambers connected by a small channel or orifice. When the engine vibrates at a low frequency (like at idle), the fluid moves back and forth between the chambers through this channel. The movement of the fluid itself counteracts the engine's vibration, effectively canceling it out. It is a form of passive damping, much more effective at isolating subtle vibrations than solid rubber alone.
- Common Applications: They are extremely common in modern passenger cars, SUVs, and luxury vehicles where a smooth, quiet ride is a primary design goal.
- Failure Modes: The complexity that makes them effective also introduces a unique failure point.
- Fuga de fluido: The most common failure is a rupture of the rubber bladder that contains the fluid. This results in the thick, dark hydraulic fluid leaking out. A leaking hydro-mount has lost all its advanced damping capability and reverts to being a poor-quality solid mount, transmitting significant vibration into the cabin. This is why a visual inspection for oily residue is so important for these types.
- Internal Orifice Blockage: Less commonly, the channel between the chambers can become blocked, preventing the fluid from moving and rendering the damping feature useless.
- Standard Rubber Failure: In addition to leaking, they are still susceptible to the same cracking, collapse, and separation issues as solid rubber mounts.
Active/Electronic Mounts: The Smart Mount
The pinnacle of current mount technology is the active or electronically controlled mount. These take the concept of the hydro-mount and add a layer of computer control.
- How They Work: Active mounts are essentially hydraulic mounts with an added twist. They can change their stiffness in real-time. The vehicle's Engine Control Unit (ECU) uses sensors to monitor engine speed, load, and vibration. It then sends a signal (often via a vacuum solenoid or an electronic actuator) to the mount, which can alter the properties of the fluid path or even generate counter-vibrations. This allows the mount to be very soft at idle for maximum comfort, and then become very stiff during hard acceleration for maximum control.
- Common Applications: These are typically found on high-end luxury and performance vehicles where engineers need to balance supreme comfort with high-performance demands.
- Failure Modes: As the most complex type, they have the most potential failure points.
- Electronic Failure: The solenoid, actuator, or the wiring leading to the mount can fail. This will often trigger a fault code in the ECU and may cause the "Check Engine" light to illuminate. The mount will typically default to its stiffest setting, causing a dramatic increase in vibration at idle.
- Vacuum Leaks: Many active mounts are vacuum-actuated. A crack in the vacuum line leading to the mount will cause it to fail, and can also create a vacuum leak that affects the engine's performance.
- All of the Above: On top of the electronic and vacuum systems, they are still fundamentally hydraulic mounts and are therefore also susceptible to fluid leaks, rubber cracking, and collapse.
The following table provides a comparative overview of these mount types.
| Caraterística | Solid Rubber Mount | Hydraulic (Hydro) Mount | Active/Electronic Mount |
|---|---|---|---|
| Principle of Operation | Damps vibration through the mass and elasticity of solid rubber. | Uses internal fluid moving between chambers to cancel specific vibration frequencies. | ECU-controlled system that actively changes mount stiffness in real-time. |
| Primary Advantage | Simple, durable, and inexpensive. | Excellent vibration damping at idle and low speeds. | The best of both worlds: maximum comfort and maximum control. |
| Primary Disadvantage | Basic vibration control; can feel harsh. | More expensive; prone to fluid leaks. | Very expensive; multiple failure points (mechanical, electrical, vacuum). |
| Key Failure Symptom | Visible cracks, collapse, separation. | Dark fluid leakage, excessive vibration at idle. | Check Engine light, fault codes, sudden onset of severe vibration. |
Knowing which type of mount your vehicle uses helps you focus your inspection. A search for fluid leaks is pointless on a vehicle with solid rubber mounts, while a sudden, harsh vibration on a luxury car should prompt you to consider the possibility of an electronic failure in an active mount. This knowledge transforms a generic inspection into a targeted, efficient diagnostic process.
The Broader Context: Maintenance, Part Quality, and Roadworthiness
Inspecting and maintaining engine mounts is not an isolated task performed in a vacuum. It is a vital part of a holistic approach to vehicle ownership and operation, deeply intertwined with legal responsibilities, the economics of part selection, and long-term maintenance strategy. This broader perspective is particularly salient for fleet operators and commercial vehicle owners in regions like Europe, Oceania, and Africa, where stringent roadworthiness standards are rigorously enforced.
The Operator's Responsibility: A Legal and Ethical Imperative
Vehicle ownership, especially of commercial goods or passenger vehicles, comes with a significant legal and ethical duty of care. The "Guide to maintaining roadworthiness" published by the UK's Driver and Vehicle Standards Agency (2025) serves as an excellent benchmark for best practices worldwide. The guide unequivocally states that licensed operators have a legal duty to ensure "satisfactory facilities and arrangements for maintaining the vehicles used under the licence in a fit and serviceable condition." It further clarifies that "every part of every braking system and of the means of operation thereof fitted to a vehicle shall be maintained in good and efficient working order and be properly adjusted."
While this specific quote refers to braking systems, the underlying principle applies to the entire vehicle. An engine mount is a safety-critical component. Its failure does not just lead to discomfort; it leads to a loss of vehicle control and can cause cascading failures of other systems. An engine that shifts uncontrollably can interfere with steering components or cause a sudden loss of power by severing a fuel line. Therefore, a broken engine mount renders a vehicle unroadworthy. Performing regular checks, as detailed in this guide, is not just good practice—it is a fundamental part of fulfilling an operator's legal obligations to the public. Ignoring the symptoms of a failed mount is a direct contravention of this duty of care.
Why Part Quality Matters: Genuine vs. Aftermarket
When a replacement is necessary, the choice of part becomes a critical decision. The market is flooded with options ranging from original equipment manufacturer (OEM) parts to a vast array of aftermarket alternatives of varying quality. This is where insights from manufacturers of heavy machinery, like Caterpillar and Komatsu, become surprisingly relevant. These companies operate in environments where component failure is not a matter of inconvenience but of massive financial loss and extreme safety risk.
Caterpillar notes that undercarriage can represent 50% of a machine's operating costs and that investing in a quality system delivers the most value (). Komatsu similarly emphasizes the importance of genuine parts for maximizing life and performance (). The logic is directly transferable to engine mounts. A cheap, low-quality aftermarket mount may save a small amount of money upfront, but it is often a false economy. These parts frequently use inferior rubber compounds that are not properly tuned to the engine's vibration frequencies. They may fail prematurely, leading to a repeat of the same symptoms and requiring another replacement, doubling the labor cost. In the worst-case scenario, a poor-quality mount fails catastrophically, causing the very collateral damage you sought to avoid.
Investing in high-quality truck engine mounting solutions from a reputable manufacturer ensures that the part meets or exceeds OEM specifications. The rubber will have the correct durometer and chemical composition to withstand heat and oil exposure, and the damping characteristics will be correctly matched to your vehicle. This leads to a longer service life, better performance, and a lower total cost of ownership—a principle that heavy equipment operators live by.
Integrating Checks into Your Maintenance Schedule
The most effective maintenance is proactive, not reactive. Rather than waiting for a loud clunk or a severe vibration to announce a problem, the inspection of engine mounts should be integrated into your vehicle's regular maintenance schedule. The DVSA guide (2025) advocates for a "maintenance scheduling system, planner or wall chart" to plan inspections in advance.
A practical approach is to perform a quick visual and torque test of the engine mounts during every oil change. This adds only a few minutes to the service but provides a regular opportunity to catch developing problems early. A more thorough inspection, perhaps including the pry bar method, could be scheduled annually or at a specific mileage interval (e.g., every 50,000 kilometers).
For fleet operators, this process should be formalized. The daily walkaround check that drivers are required to perform should include instructions to be alert for new vibrations or noises. Any such reports must be documented and investigated promptly. Formal safety inspections, conducted by competent technicians at scheduled intervals, must explicitly list engine and transmission mounts as check items. By systematizing the inspection process, you move from a reactive "fix-it-when-it-breaks" model to a proactive "prevent-the-failure" strategy, which is safer, more cost-effective, and ensures legal compliance. The health of a vehicle's engine mounts is a reliable barometer for the overall quality of its maintenance regimen.
When to Seek Professional Help
While this guide provides a comprehensive framework for diagnosing the health of your engine mounts, it is equally important to recognize the boundaries of one's own expertise and equipment. There are situations where turning the job over to a qualified professional is the wisest, safest, and ultimately most cost-effective course of action.
Recognizing Your Limits
DIY vehicle maintenance can be a rewarding and empowering experience, but it requires an honest self-assessment of your skills and comfort level. You should consider seeking professional help if:
- Access is Difficult: On many modern, compact vehicles, the engine bay is incredibly crowded. Reaching, let alone inspecting or replacing, certain mounts (especially the rear or transmission mounts) may require removing other major components like axles, subframes, or exhaust parts. This can quickly escalate a simple job into a complex one.
- You Have Active/Electronic Mounts: Diagnosing problems with active mounts often requires specialized diagnostic scan tools to read fault codes from the ECU and test the electronic actuators. Attempting to diagnose these systems without the proper equipment can be fruitless and may even cause further damage.
- The Problem is Unclear: If you have performed the checks outlined in this guide and are still unsure about the source of the noise or vibration, a professional technician can bring a fresh perspective and more advanced diagnostic tools (like chassis ears or vibration analyzers) to the problem. It is better to pay for a correct diagnosis than to replace a part that was not faulty.
- You Lack the Right Tools or a Safe Environment: If you do not have a floor jack and jack stands, or a safe, level place to work, do not attempt any work that requires getting under the vehicle. The risk of serious injury or death from a vehicle falling is not worth the potential savings.
Finding a Reputable Technician
Choosing a mechanic or service center deserves the same diligence as choosing a doctor. A good technician is a valuable partner in maintaining your vehicle's health and safety. When looking for professional help, consider the following:
- Specialization: Look for a shop that specializes in your vehicle's make or has extensive experience with it. They will be more familiar with common issues and have the correct specialized tools.
- Certifications: Look for certifications from recognized automotive bodies (e.g., ASE in North America, or equivalent qualifications in your region). This indicates that the technicians have passed standardized tests of their knowledge and competence.
- Transparency: A good shop will be willing to explain the problem to you in clear terms, show you the failed part, and provide a detailed, itemized estimate before any work begins. They should be comfortable answering your questions.
- Reputation and Reviews: In the digital age, it is easy to check online reviews and ask for recommendations from local car clubs or community forums. A long-standing positive reputation is often a sign of quality workmanship and fair business practices.
Knowing when to tackle a job yourself and when to call in an expert is a skill in itself. It demonstrates a mature and responsible approach to vehicle maintenance, prioritizing a correct and safe outcome above all else.
Perguntas frequentes (FAQ)
How much does it cost to replace an engine mount?
The cost can vary dramatically depending on the vehicle, the type of mount, and labor rates in your area. For a simple solid rubber mount on a common vehicle, the part might cost between $50 and $150, with labor taking one to two hours. For a complex, difficult-to-access hydraulic or active mount on a luxury vehicle, the part alone could cost over $500, and labor could involve several hours of work, pushing the total cost towards $1,000 or more per mount.
Can I drive with a broken engine mount?
While it may be physically possible to drive the vehicle, it is strongly discouraged. A broken mount allows for excessive engine movement, which puts severe stress on coolant hoses, wiring, axles, and the exhaust system. A catastrophic failure could cause the engine to shift dramatically, potentially leading to a loss of control or a sudden breakdown. It is a safety risk that should be addressed as soon as possible.
How long do engine mounts last?
The lifespan of an engine mount depends on the type of mount, the vehicle, driving conditions, and environmental factors. As a general guideline, many mounts can last for 80,000 to 150,000 kilometers (approx. 50,000 to 93,000 miles). However, mounts on vehicles driven in harsh conditions (rough roads, extreme temperatures) or those subjected to high performance driving may fail sooner. Hydraulic and active mounts, due to their complexity, may also have a shorter lifespan than simple solid rubber mounts.
Are all engine mounts the same?
No, they are highly specific to the vehicle's make, model, year, and often even the engine and transmission combination. A mount for a 4-cylinder engine will have different damping properties than one for a V8. A mount for an automatic transmission may be different from one for a manual. It is crucial to use high-quality parts like heavy-duty engine mounts that are specifically designed for your exact vehicle to ensure proper fit and function.
What's the difference between an engine mount and a transmission mount?
They perform the same basic function but are located in different places. Engine mounts support the engine itself, typically on either side of the engine block. A transmission mount supports the rear of the transmission. Together, they form a complete system that supports the entire powertrain (engine and transmission assembly). A failure in any one of them will affect the stability of the whole system.
Will a bad engine mount cause a check engine light?
Usually, a standard solid rubber or hydraulic mount will not trigger a check engine light. The light is typically related to the engine's emissions or performance sensors. However, an active/electronic mount can cause a check engine light if its electronic control system fails, as this failure is monitored by the ECU. Additionally, in severe cases, the violent movement caused by any bad mount could damage a sensor or wiring harness, which could then trigger the light indirectly.
Conclusão
The engine mounting is a component that works tirelessly in the background, performing a task that is fundamental to the safe and comfortable operation of any vehicle. It is both the anchor that tames the immense forces of the engine and the cushion that isolates its inherent roughness from the vehicle's occupants. To neglect its health is to ignore a foundational element of the vehicle's mechanical integrity. The emergence of a clunk, a shudder, or a vibration is not merely an annoyance; it is a direct communication from your vehicle, a signal that this critical connection has been compromised.
Learning how to check engine mounting is an accessible skill that empowers any vehicle owner or operator. It requires not a vast arsenal of tools but rather a methodical approach, a keen eye for detail, and an unwavering commitment to safety. By integrating these checks into a regular maintenance routine, you transform your relationship with your vehicle from one of reactive repair to one of proactive care. This approach not only prevents the cascade of collateral damage that a failed mount can cause but also aligns with the legal and ethical responsibilities of ensuring your vehicle is roadworthy at all times. Ultimately, a well-maintained set of engine mounts provides more than just a smooth ride; it provides the confidence and peace of mind that come from knowing your vehicle is both safe and sound, from its largest systems down to its most crucial connections.
Referências
Caterpillar. (2021). Cat® undercarriage. Retrieved from
Driver and Vehicle Standards Agency. (2025). Guide to maintaining roadworthiness: Commercial goods and public service vehicles. Retrieved from https://assets.publishing.service.gov.uk/media/6824a454b9226dd8e81ab890/guide-to-maintaining-roadworthiness-commercial-goods-and-public-service-vehicles.pdf
Komatsu. (2025). Undercarriage: Maintenance tips. Retrieved from
Komatsu. (2025). Parts. Retrieved from