.png)
.png)


Практическое руководство из 5 шагов: Как проверить крепление двигателя на вашем грузовике в 2026 году
31 декабря 2025 года
Аннотация
В этом документе всесторонне рассматриваются процедуры проверки креплений двигателя коммерческих грузовиков. В нем раскрывается фундаментальная роль креплений двигателя в изоляции вибраций силового агрегата от шасси автомобиля', что повышает комфорт оператора и сохраняет структурную целостность связанных с ним компонентов. В анализе подробно описаны основные симптомы, свидетельствующие о неисправности крепления, включая чрезмерную вибрацию, ударные шумы и заметные смещения двигателя. Представлена систематическая пятиступенчатая методология диагностики, включающая предварительную подготовку к обеспечению безопасности, тщательный визуальный осмотр и динамические физические испытания для оценки степени износа или повреждения. Рассматриваются различные типы опор двигателя, такие как резиновые, гидравлические и активные электронные варианты, и описываются их специфические режимы отказа. В исследовании подчеркиваются последствия, которые могут возникнуть в результате небрежного отношения к креплениям, влияющие на выхлопные системы, трансмиссии и другие важные детали грузовиков. Цель состоит в том, чтобы вооружить владельцев, операторов и специалистов по техническому обслуживанию необходимыми знаниями для точной диагностики и своевременного вмешательства для обеспечения безопасности, надежности и долговечности автомобиля.
Основные выводы
- Определите неисправность креплений, почувствовав необычные вибрации, услышав стук или увидев движение двигателя.
- Перед любым осмотром всегда отдавайте предпочтение безопасности, закрепляя автомобиль на ровной поверхности.
- Визуально проверьте крепления на наличие трещин, утечек жидкости и расслоения между резиной и металлом.
- Проведите проверку тормозов с усилителем, чтобы проверить, нет ли чрезмерного подъема или смещения двигателя.
- Понимание того, как проверить крепление двигателя, предотвращает дорогостоящие повреждения других систем автомобиля.
- Замените изношенные крепления высококачественными компонентами, чтобы восстановить устойчивость и комфорт автомобиля.
- Регулярные проверки - это недорогая стратегия поддержания здоровья всего силового агрегата.
Оглавление
- Понимание назначения опоры двигателя'
- Симптомы неисправности опор двигателя
- Шаг 1: Подготовка к безопасному и эффективному осмотру
- Шаг 2: тщательный визуальный осмотр
- Шаг 3: Проведение физических и динамических испытаний
- Шаг 4: Передовые методы диагностики для современных грузовиков
- Шаг 5: Интерпретация полученных результатов и принятие решения о дальнейших действиях
- Часто задаваемые вопросы (FAQ)
- Последние размышления
- Ссылки
Понимание назначения опоры двигателя'
Прежде чем мы сможем предметно обсудить, как проверить крепление двигателя, мы должны глубже понять объект нашего исследования. Что такое крепление двигателя и какую жизненно важную функцию оно выполняет в сложной экосистеме современного грузовика? Подходить к этому вопросу - значит вступать в диалог между грубой механической силой и необходимостью обеспечения стабильности конструкции и комфорта человека. Опора двигателя - это не просто кронштейн; это тщательно продуманный компонент, призванный выполнять две, казалось бы, противоречивые роли. Во-первых, она должна надежно крепить огромный вес и мощность двигателя и трансмиссии к раме автомобиля'. Во-вторых, он должен поглощать и гасить вибрации, удары и крутящие усилия, возникающие при работе двигателя, не позволяя им распространяться по шасси и попадать в салон.
Подумайте о нем как о сложном переговорщике. С одной стороны, у вас есть двигатель - силовая установка с управляемыми взрывами, вращающимися массами и реакциями крутящего момента. С другой - рама, скелет грузовика, которому требуется устойчивая платформа для поддержки кабины, груза и всех остальных систем. Опора двигателя находится в центре этих отношений, преобразуя энергию двигателя в управляемую, затухающую силу. Без этого посредника ощущения от вождения были бы невыносимо жесткими, каждый цикл сгорания ощущался бы как сотрясающая дрожь. Более того, постоянная незатухающая вибрация вызвала бы усталость металла, что привело бы к преждевременному выходу из строя рамы, сварных швов и других деталей грузовика.
Физика демпфирования вибраций
Основной принцип работы - виброизоляция. Любой двигатель внутреннего сгорания производит вибрации на различных частотах - это явление обусловлено возвратно-поступательным движением поршней и динамикой вращения коленчатого вала. Эти вибрации могут быть особенно выражены в дизельных двигателях, характерных для коммерческих грузовиков, которые работают на более низких оборотах с более высокой степенью сжатия. Если частота этих колебаний совпадает с собственной резонансной частотой шасси автомобиля' или других компонентов, амплитуда вибрации может значительно увеличиться. Это разрушительное явление, известное как резонанс, способно раздробить детали.
Опоры двигателя разработаны таким образом, чтобы быть "настроенными" на противодействие этим специфическим частотам. Они действуют как фильтр низких частот, позволяя двигателю совершать медленные, целенаправленные движения (например, реагировать на крутящий момент) и отсеивая при этом высокочастотные дребезжания и тряску. Обычно это достигается за счет использования эластомерных материалов, чаще всего резины, которые обладают вязкоупругими свойствами. Это означает, что они обладают как вязкостью (сопротивление течению, которое помогает рассеивать энергию в виде тепла), так и эластичностью (способность деформироваться и возвращаться к своей первоначальной форме). Конкретный состав и геометрия резинового блока в креплении разрабатываются таким образом, чтобы обеспечить оптимальный баланс жесткости и демпфирования для конкретного автомобиля' с учетом характеристик силового агрегата (Jazar, 2017).
Эволюция технологии крепления двигателя
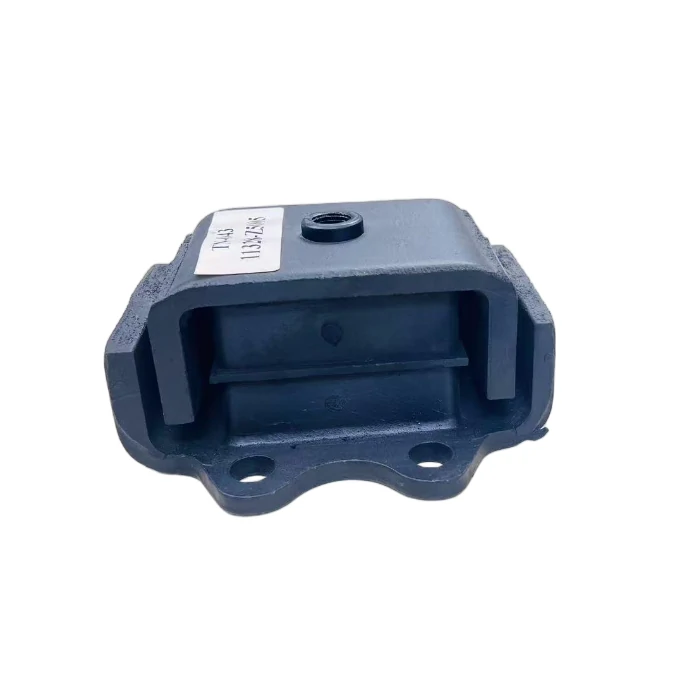
За прошедшие десятилетия скромная опора двигателя претерпела значительные изменения, превратившись из простых резиновых блоков в сложные интеллектуальные устройства. Понимание этих различных типов является основополагающим для правильной проверки крепления двигателя, поскольку режимы их отказа отличаются.
| Тип крепления | Механизм действия | Общие индикаторы неисправностей | Пригодность для использования в грузовых автомобилях |
|---|---|---|---|
| Обычная резина | Блок из специально разработанной резины закреплен между двумя металлическими пластинами (одна для двигателя, другая для рамы). Он поглощает вибрации благодаря естественным демпфирующим свойствам резины. | Трещины, потускнение, затвердение или полное отделение резины от металлических пластин. Сжимается или "провисает" со временем. | Очень часто встречается на старых грузовиках и некоторых современных малотоннажных машинах. Ценится за простоту и низкую стоимость. Менее эффективны при демпфировании в широком диапазоне частот. |
| Гидравлические (гидромонтажные) | Они содержат резиновый элемент и две соединенные между собой камеры, заполненные гидравлической жидкостью (часто на основе гликоля). Мембрана или отверстие регулируют поток жидкости между камерами, активно противодействуя вибрациям. | Видимые потеки маслянистой жидкости, развалившийся внешний вид и те же признаки разрушения резины, что и у обычных креплений. При выходе из строя часто издают "хлюпающий" или "лязгающий" звук. | Широко используется в современных легковых автомобилях и многих современных грузовиках малой и средней грузоподъемности. Обеспечивает превосходное демпфирование в более широком диапазоне частот по сравнению с простыми резиновыми креплениями. |
| Активный/электронный | Это усовершенствованные гидроопоры, в которые встроен электронный привод, управляемый блоком управления двигателем (ECU) автомобиля'. ЭБУ использует датчики для определения оборотов двигателя и нагрузки, а затем направляет привод на активное изменение жесткости крепления в режиме реального времени для идеального гашения вибраций. | Утечки жидкости, электронные коды неисправностей (индикатор Check Engine Light), полная потеря функции амортизации (возврат к жесткому креплению), а также физические повреждения проводки или разъемов. | Все чаще встречается в дорогих пассажирских автомобилях и некоторых современных тяжелых грузовиках, где комфорт в салоне и шум, вибрация и жесткость (NVH) имеют первостепенное значение. Процесс проверки крепления двигателя на них более сложен. |
Как видите, технология продвинулась от пассивного демпфирования до адаптивного подавления вибраций в режиме реального времени. Простой визуальный и физический осмотр, который может быть достаточным для обычного резинового крепления, является лишь первым шагом в диагностике потенциально неисправного активного крепления, которое также требует электронного диагностического подхода. Такая сложность подчеркивает необходимость методичного процесса проверки.
Симптомы неисправности опор двигателя
Износ опоры двигателя редко бывает внезапным, катастрофическим. Чаще всего это постепенный спад, медленная эрозия его способности быть посредником между двигателем и рамой. Симптомы, которые она выдает, являются языком этого ухудшения, и научиться интерпретировать их - первый навык, который должен выработать техник или оператор. Эти симптомы не всегда относятся исключительно к опорам двигателя; они могут пересекаться с проблемами, связанными с трансмиссией, трансмиссией и даже деталями ходовой части. Поэтому часто требуется тщательный процесс устранения. Давайте рассмотрим основные симптомы подробнее.
Тревожная симфония звуков
Одним из наиболее распространенных признаков неисправной опоры двигателя является появление новых и нежелательных звуков в работе автомобиля'. Эти звуки обычно вызваны контактом металла с металлом, который не должен происходить, или чрезмерным движением силового агрегата.
-
Звон или стук: Классическим признаком является отчетливый звук "лязг" или "стук" во время определенных событий. Вы можете услышать его при переключении трансмиссии из режима Park в режим Drive или Reverse, так как нагрузка на двигатель'резко смещается. Вы также можете услышать его при резком ускорении или замедлении. Что здесь происходит? Здоровое крепление допускает контролируемый изгиб, но изношенное или сломанное крепление допускает чрезмерное движение. Звук, который вы слышите, - это часто блок двигателя или прикрепленный к нему кронштейн, соприкасающийся с рамой автомобиля или другим компонентом. Представьте себе слишком длинный трос; предмет на его конце может раскачиваться достаточно далеко, чтобы удариться о стену. Именно это, по сути, и происходит в вашем моторном отсеке.
-
Дребезжание или постукивание: Более настойчивый дребезжащий или постукивающий звук, особенно на холостом ходу или низких скоростях, также может указывать на неисправность крепления. Это может быть вызвано дребезжанием внутренних компонентов разрушенного гидравлического крепления или тем, что разошедшееся крепление позволяет ослабленному болту или кронштейну вибрировать относительно рамы. Этот звук бывает особенно трудно определить, иногда его принимают за утечку выхлопных газов или неплотно прилегающий теплозащитный экран. Использование стетоскопа механика' может оказать неоценимую помощь в поиске источника такого звука.
Ощутимый трепет вибрации
Основная задача опоры двигателя - поглощать вибрацию. Когда она выходит из строя, вибрация передается непосредственно на шасси и, соответственно, на пассажиров. Характер вибрации может дать представление о характере поломки крепления.
-
Чрезмерная вибрация на холостом ходу: Если при остановке на светофоре ваш грузовик ощущается как массажное кресло, а руль, приборная панель и сиденья неприятно гудят, главным подозреваемым является разрушившаяся или затвердевшая опора двигателя. Резина или гидравлическая жидкость больше не справляются со своей задачей по изоляции присущих двигателю' вибраций на холостом ходу. Вибрация может сглаживаться по мере увеличения числа оборотов двигателя, что является ключевым диагностическим признаком.
-
Вибрация под нагрузкой: Вы можете заметить неровное, дрожащее ощущение, возникающее только при нагрузке на двигатель, например, при подъеме в гору или ускорении. Это происходит потому, что двигатель создает больший крутящий момент и, соответственно, большую энергию колебаний. Вышедшее из строя крепление, которое еще способно гасить вибрации на холостом ходу, может быть полностью перегружено этими более мощными силами, позволяя им передаваться на раму.
Визуальный сигнал о движении двигателя
Иногда самым прямым доказательством является то, что вы можете увидеть. Двигатель и трансмиссия должны быть надежно закреплены и иметь лишь небольшой, контролируемый ход. Когда крепление выходит из строя, это надежное соединение нарушается.
-
Двигатель кренится: С открытым капотом пусть в кабину сядет надежный помощник. Пока вы следите за работой двигателя, пусть он (не снимая ноги с тормоза) переключит трансмиссию из режима Park в режим Drive, а затем в режим Reverse. Здоровый силовой агрегат покажет легкое покачивание. Трансмиссия с неисправным креплением будет демонстрировать гораздо более резкий крен или рывок, иногда поднимаясь на несколько дюймов. Это явный признак того, что крепление больше не сдерживает реакцию двигателя' на крутящий момент.
-
Несогласованные компоненты: В тяжелых случаях поломки креплений вы можете заметить, что двигатель как будто проседает или сидит в моторном отсеке криво. Это может привести к множеству дополнительных проблем. Вентилятор охлаждения может соприкоснуться с кожухом радиатора, что может привести к катастрофе. Шланги и жгуты проводов могут быть растянуты до предела. Может нарушиться центровка трансмиссии, что приведет к огромной нагрузке на карданные шарниры, выходной вал коробки передач и дифференциал - все это дорогостоящие детали для замены. Взаимосвязь между стабильностью работы двигателя и здоровьем других компонентов, включая детали ходовой части, на которые влияют углы наклона трансмиссии, невозможно переоценить.
| Симптом | Распространенные причины, связанные с опорами двигателя | Потенциальный вторичный ущерб |
|---|---|---|
| Громкий "лязг" при переключении передач/разгоне | Отделение резины от металлического корпуса или полностью разрушенное крепление, допускающее чрезмерное движение двигателя. | Ударные повреждения брандмауэра, радиатора или других компонентов моторного отсека. Нагрузка на выпускной коллектор и трубы. |
| Постоянная вибрация в кабине/на рулевом колесе | Затвердевшая или разрушившаяся резина в твердом креплении или потеря жидкости в гидравлическом креплении. Крепление больше не поглощает вибрации. | Усталость и дискомфорт водителя. Ослабление отделки салона и элементов приборной панели со временем. |
| Двигатель заметно приподнимается/смещается | Вышло из строя одно или несколько креплений, в частности, динамометрическая стойка или крепление "собачья кость", предназначенное для контроля вращательного движения. | Лопнувшие шланги радиатора, растянутые жгуты проводов, поврежденный вентилятор/обтекатель охлаждения, ускоренный износ компонентов трансмиссии и привода. |
| Дребезжащие звуки из моторного отсека | Ослабленные внутренние детали вышедшего из строя гидравлического крепления или ослабленный болт на отделившемся креплении, вибрирующем от удара о раму. | Сложно диагностировать без тщательного изучения процедуры проверки крепления двигателя; можно принять за другие проблемы. |
Шаг 1: Подготовка к безопасному и эффективному осмотру
Желание быстро поставить диагноз должно сочетаться с заботой о личной безопасности. Моторный отсек грузового автомобиля - это место с огромным запасом энергии: весом, натяжением ремней и возможностью внезапного движения. Методичная подготовка - это не просто предварительный шаг; это основополагающий элемент успешного и травмобезопасного осмотра. Принципы дорожной годности и безопасного обслуживания, изложенные такими агентствами, как Агентство по стандартам для водителей и транспортных средств Великобритании (DVSA, 2025), начинаются с создания безопасной рабочей среды.
Обеспечение безопасности автомобиля и рабочего места
В первую очередь необходимо нейтрализовать потенциал автомобиля к движению.
- Найдите ровную площадку: Никогда не пытайтесь выполнять эту работу под наклоном. Ровная, устойчивая поверхность - обязательное условие. Идеальным вариантом является асфальтированная подъездная дорога, пол гаража или ровный отсек мастерской. Работа на мягком грунте, таком как трава или грязь, может привести к смещению или проседанию домкратов или стоек, что создаст крайне опасную ситуацию.
- Включите стояночный тормоз: Затяните стояночный тормоз с полным усилием. Если ваш грузовик оборудован пневматическими тормозами, убедитесь, что система полностью заряжена и задействованы пружинные тормоза.
- Заблокируйте колеса: Это шаг критического резервирования. Установите мощные противооткатные упоры как перед, так и позади хотя бы одного из колес, которые останутся на земле. Если вы поднимаете только передние, надежно заблокируйте задние колеса. Это предотвратит любую возможность скатывания грузовика вперед или назад.
Соберите необходимые инструменты
Наличие необходимых инструментов перед началом работы предотвращает необходимость останавливаться на полпути. Это позволит вам работать эффективно и безопасно. Хотя конкретные инструменты могут немного отличаться в зависимости от марки и модели вашего грузовика', этот список охватывает все самое необходимое для комплексной проверки.
- Средства индивидуальной защиты (СИЗ): Обязательно используйте защитные очки, чтобы защитить глаза от падающего мусора, грязи или капающих жидкостей. Хорошая пара перчаток механика'защитит ваши руки от порезов, царапин и грязи.
- Высококачественный источник света: Моторный отсек - это лабиринт теней. Мощный светодиодный рабочий свет или яркая фара незаменимы для освещения креплений, которые часто расположены в труднодоступных местах.
- Стетоскоп Mechanic's: Хотя стетоскоп не является строго необходимым для базовой проверки, он представляет собой невероятно полезный диагностический инструмент. Он позволяет точно определить источник шума, усиливая звуки в определенном месте, что помогает отличить плохое крепление от, например, шумного водяного насоса.
- Выколотка: Для физической проверки креплений необходим длинный, прочный выколотка (не менее 24 дюймов или 60 см). Он обеспечивает рычаг, необходимый для проверки на наличие чрезмерного люфта. Выбирайте такой инструмент с удобной рукояткой.
- Напольный домкрат и домкратные стойки: Скорее всего, вам придется немного приподнять двигатель, чтобы проверить крепления или ослабить давление для лучшего визуального осмотра. Для этого необходим мощный напольный домкрат, рассчитанный на вес вашего двигателя. Очень важно, чтобы у вас также был набор подставок для домкрата соответствующего номинала. Никогда, ни при каких обстоятельствах не работайте под автомобилем или двигателем, опирающимся только на домкрат. Домкраты могут выйти из строя.
- Деревянный блок: Небольшой деревянный брусок (например, 4×4 или 10×10 см) помещается между домкратом и масляным поддоном двигателя, чтобы распределить нагрузку и предотвратить повреждение поддона.
- Основные ручные инструменты: Набор торцевых головок, гаечных ключей и отверток может понадобиться для снятия пластиковых крышек двигателя или теплозащитных экранов, которые могут мешать обзору креплений.
- Зеркало и магнит: Небольшое смотровое зеркало на выдвижной ручке поможет увидеть скрытые стороны опоры двигателя. Телескопический магнит пригодится для поиска упавших инструментов или крепежа.
Понимание особенностей компоновки вашего грузовика
Не все грузовики построены одинаково. Наклонная вперед кабина над двигателем (COE) будет иметь совсем другой доступ по сравнению с обычным грузовиком с длинным капотом. Количество и расположение креплений двигателя также может быть разным. Большинство двигателей с рядными шестерками или V8 на грузовиках имеют как минимум три основные точки крепления: две основные несущие опоры по обе стороны блока двигателя и третья опора, часто в задней части трансмиссии, для контроля крутящего момента и обеспечения вертикальной опоры. На некоторых автомобилях также используется верхняя распорка или крепление "собачья кость" для дальнейшего контроля вращательного движения двигателя.
Прежде чем приступить к работе, ознакомьтесь с заводским руководством по обслуживанию вашего автомобиля'. Этот документ является самым ценным источником информации. В нем вы найдете точное расположение каждого крепления, тип используемого крепления (резиновое, гидравлическое), а зачастую и конкретные процедуры проверки крепления двигателя на конкретной модели.
Шаг 2: тщательный визуальный осмотр
Когда рабочее место подготовлено, а мысли направлены на безопасность, можно приступать к диагностике. Визуальный осмотр - это тщательное наблюдение, поиск тонких признаков износа и усталости. Это неинвазивная процедура, которая часто может предоставить все необходимые доказательства для осуждения неисправного крепления. Подходите к этому шагу с терпением и ярким светом.
Расположение каждой опоры двигателя
Используя руководство по техническому обслуживанию, систематически определяйте местонахождение каждого крепления двигателя и трансмиссии. Начните с основных креплений по обе стороны двигателя. Они обычно прикручены к раме и блоку двигателя, часто расположены низко и иногда частично скрыты другими компонентами, такими как генератор или компрессор кондиционера. Затем найдите крепление трансмиссии, которое обычно находится в задней части корпуса трансмиссии, где оно крепится болтами к поперечине рамы. Наконец, проверьте наличие верхних стоек или стабилизаторов поперечной устойчивости, которые часто располагаются в верхней части двигателя и соединяются с брандмауэром или стойкой.
Находя каждое крепление, очищайте окружающее пространство тряпкой. Налет грязи и смазки может легко скрыть те самые трещины или утечки, которые вы ищете. Это дисциплина, которая отделяет опытного специалиста от случайного наблюдателя.
На что обратить внимание: Признаки неудачи
Глаза - ваш основной инструмент диагностики. Осветите каждое крепление под разными углами и используйте зеркало для осмотра со всех сторон. Вы ищете отклонения от здорового состояния.
Для всех типов креплений (резиновые, гидравлические, активные):
- Трещины и разрывы в резине: Резиновый элемент - это сердце крепления. Ищите любые признаки растрескивания, от мелких поверхностных трещин до глубоких трещин, проникающих в блок. Уделите пристальное внимание местам, где резина приклеена к металлическим пластинам. Любой признак расслоения или отслоения здесь указывает на то, что крепление не работает. Резина должна быть податливой; если она кажется затвердевшей, хрупкой или крошащейся, значит, ее демпфирующие свойства сильно нарушены.
- Провисание или сжатие: Сравните крепления с обеих сторон двигателя. Не кажется ли, что одна сторона провисает или более сжата, чем другая? Провисшее крепление приведет к тому, что двигатель будет сидеть ниже с этой стороны. Иногда для подтверждения разницы можно измерить расстояние от точки на блоке двигателя до рамы с обеих сторон. Развалившееся крепление потеряло способность обеспечивать поддержку и является явным признаком необходимости его замены.
- Контакт "металл-металл": Ищите блестящие, полированные участки на металлических деталях крепления или на раме рядом. Это верный признак того, что крепление разрушилось или сломалось до такой степени, что металлические детали ударяются друг о друга при движении двигателя. Это и есть источник "лязгающих" звуков, о которых говорилось ранее.
- Коррозия и повреждения: В зависимости от климата некоторые поверхностные следы ржавчины на металлических корпусах могут быть нормальными, но обратите внимание на сильную, отслаивающуюся ржавчину, которая может нарушить структурную целостность корпуса крепления'. Также проверьте, нет ли признаков повреждения от ударов дорожным мусором или в результате предыдущей попытки неправильного домкратирования.
Специально для гидравлических и активных креплений:
- Утечки жидкости: Это дымящийся пистолет для неисправного гидрокрепления. Эти крепления заполнены специализированной гидравлической жидкостью. Ищите темный маслянистый след на поверхности крепления и на раме или поперечине непосредственно под ним. Вытекшая жидкость притягивает к себе слой грязи и копоти, из-за чего вышедшее из строя крепление выглядит гораздо грязнее своих здоровых собратьев. Протечка означает, что крепление утратило способность к гидравлическому демпфированию и теперь функционирует, в лучшем случае, как низкокачественное крепление из твердой резины.
Внимательный визуальный осмотр требует мышления криминалиста. Вы не просто смотрите на деталь; вы читаете историю ее жизни, написанную на языке напряжения, усталости и деградации материала. Собранные здесь доказательства станут основой для последующих более динамичных испытаний.
Шаг 3: Проведение физических и динамических испытаний
Хотя визуальный осмотр может выявить множество неисправностей, некоторые опоры двигателя могут выглядеть неповрежденными, но потерять внутреннюю целостность. Резина может размягчиться, или внутренний клапан гидронавески может выйти из строя без внешней утечки. Чтобы выявить эти более тонкие неисправности, необходимо приложить усилие и понаблюдать за реакцией крепления'. Эти испытания показывают, как крепление ведет себя под нагрузкой, что и является его основной задачей. Безопасность при проведении этих процедур имеет первостепенное значение, поскольку вы намеренно заставляете двигатель двигаться.
Тест на мощность тормозов: Динамическая оценка
Этот тест, также известный как "затяжка тормозов", является одним из наиболее эффективных способов проверки целостности крепления двигателя. Он имитирует максимальную крутящую нагрузку, которую двигатель оказывает на крепления во время резкого ускорения. Для этого теста требуется два человека: водитель в кабине и наблюдатель, следящий за работой двигателя. Наблюдатель должен стоять сбоку от автомобиля, но ни в коем случае не перед ним.
- Позиционирование и коммуникация: Наблюдателю должен быть хорошо виден двигатель, особенно его главные опоры и верхние стойки крутящего момента. Установите четкие сигналы рукой или устные команды между водителем и наблюдателем.
- Процедура (драйв): Водитель запускает двигатель и с максимальным усилием нажимает на рабочие тормоза. Не снимая ноги с тормоза, водитель переключает коробку передач в положение "Drive". Затем водитель плавно нажимает на педаль газа в течение нескольких секунд, слегка повышая обороты двигателя (не более 1 200-1 500 об/мин).
- Наблюдение (Драйв): Наблюдатель внимательно следит за двигателем. При нажатии на педаль газа двигатель будет пытаться вращаться. Одна сторона будет подниматься, а другая - прижиматься. Вы следите за величиной подъема. Небольшое движение (возможно, на дюйм или 2-3 см) - это нормально. Однако если двигатель поднимается чрезмерно, сильно кренится или слышен громкий лязг, это свидетельствует о неисправности крепления на стороне, которая поднимается.
- Процедура (обратная): Водитель возвращает двигатель на холостой ход и переключается на "Нейтраль". Затем переключается на "задний ход", снова крепко держа ногу на тормозе. В течение нескольких секунд они плавно нажимают на педаль газа.
- Наблюдение (обратное): Наблюдатель снова следит за двигателем. В обратном направлении двигатель будет пытаться вращаться в противоположном направлении. Сторона двигателя, которая была прижата при испытании "Привод", теперь попытается подняться. Снова обратите внимание на чрезмерное движение или шум.
Этот тест эффективно изолирует крепления с каждой стороны. Проверяется то крепление, которое находится под напряжением (то, которое сопротивляется подъему). Если двигатель значительно поднимается со стороны водителя в режиме Drive, скорее всего, виновато крепление со стороны пассажира. Если при движении задним ходом двигатель значительно приподнимается со стороны пассажира, подозревайте крепление со стороны водителя.
Метод "пробойника": Статическая физическая проверка
Этот метод полезен для проверки люфта в креплениях при выключенном двигателе. Он особенно хорош для оценки крепления трансмиссии и для определения состояния основных креплений без помощника.
- Доступ к горе: Выберите четкое и устойчивое положение, с которого можно подобраться к проверяемому креплению. Для этого может потребоваться работать сверху или безопасно поднять автомобиль и закрепить его на подставках для домкрата, чтобы работать снизу.
- Расположите выколотку: Просуньте кончик шила между кронштейном крепления со стороны двигателя и кронштейном со стороны рамы или самой рамой. Вы должны иметь возможность приложить усилие непосредственно к креплению. Будьте осторожны, чтобы не задеть хрупкие детали, такие как датчики, топливопроводы или масляный поддон.
- Применить силу: Твердым, контролируемым движением надавите на крепление, чтобы попытаться поднять или сдвинуть двигатель. Вы ощущаете сопротивление и движение.
- Интерпретируйте ощущения: Здоровое крепление будет упругим и прочным. Оно допускает небольшой изгиб, но ощущение будет таким, будто вы давите на твердую пружинистую резину. Неисправное крепление часто кажется "кашеобразным" или рыхлым. Возможно, вы сможете сдвинуть двигатель на значительную величину, не прилагая особых усилий, и услышите или почувствуете "лязг" при соприкосновении внутренних металлических частей крепления. В креплениях трансмиссии часто можно увидеть, как резина отделяется или чрезмерно растягивается при надавливании.
Испытание двигателя домкратом
Этот тест особенно полезен для проверки креплений, которые разрушились в вертикальном направлении.
- Расположите домкрат: Установите напольный домкрат под масляный поддон двигателя, положив между ними деревянный брусок для защиты поддона. Расположите его как можно ближе к осматриваемому креплению.
- Нанесите мягкий лифтинг: Медленно и осторожно поднимите домкрат, чтобы снять вес двигателя с опоры. Поднимать двигатель нужно совсем немного - часто достаточно четверти дюйма (около 5-6 мм).
- Осмотрите гору: Внимательно следите за тем, как груз снимается с крепления. Если крепление сломано или отделено, вы увидите, что между резиной и металлическим корпусом или между двумя основными металлическими частями крепления образовался зазор. Двигатель, который значительно приподнимается до того, как крепление начинает отрываться от рамы, указывает на то, что крепление полностью отделилось.
Сочетание информации, полученной в результате этих трех тестов, дает полное представление о состоянии опор двигателя. Визуальный дефект в сочетании с чрезмерным движением при динамическом испытании и ощущением неплотности при статическом испытании оставляет мало места для сомнений.
Шаг 4: Передовые методы диагностики для современных грузовиков
Для профессионального техника или владельца более нового, технологически продвинутого грузовика базовые процедуры проверки крепления двигателя - это лишь отправная точка. Интеграция электроники в компоненты силового агрегата, включая опоры двигателя, требует более сложного диагностического подхода. Кроме того, для выявления тонких проблем, связанных с NVH (шум, вибрация и жесткость), часто требуются инструменты, выходящие за рамки простых визуальных и физических проверок.
Сканирование кодов неисправностей
Появление активных или электронно-управляемых опор двигателя означает, что они теперь являются частью бортовой диагностической сети автомобиля'. Эти опоры, которые могут изменять свою жесткость в режиме реального времени, управляются ЭБУ или специальным модулем управления подвеской.
- Роль ЭБУ: ЭБУ постоянно контролирует такие параметры, как обороты двигателя, положение дроссельной заслонки, скорость автомобиля, а иногда даже имеет специальные датчики вибрации (акселерометры) на блоке двигателя. Используя эти данные, он посылает сигнал (часто это сигнал с широтно-импульсной модуляцией или ШИМ) на исполнительный механизм внутри крепления. Этот привод может использовать вакуум или электромагнитный соленоид для изменения направления движения жидкости или жесткости крепления, оптимизируя его демпфирующие характеристики для текущих условий эксплуатации (Inoue, 2021).
- Когда происходят сбои: Если привод выходит из строя, повреждается проводка или внутренний датчик крепления' (при наличии) выдает показания, выходящие за пределы диапазона, ЭБУ регистрирует диагностический код неисправности (DTC). При этом почти наверняка загорится контрольная лампа неисправности (MIL), также известная как лампа Check Engine.
- Использование диагностического сканера: Поэтому подключение сканера профессионального класса OBD-II (On-Board Diagnostics II) является обязательным шагом при проверке автомобиля с активными креплениями. Вам нужны не просто общие коды трансмиссии, а сканер, способный считывать специфические коды производителя с модулей управления кузовом и шасси. DTC, относящийся к "Цепи привода виброгасителя" или "Соленоиду управления опорами двигателя", укажет вам непосредственно на неисправный компонент, что значительно сэкономит время диагностики. Сканер также может позволить вам провести активный тест, дав команду креплению переключаться между "мягкой" и "жесткой" настройками и наблюдая за его реакцией.
Использование стетоскопа механика'
Поиск неуловимых шумов - одна из самых сложных задач автомобильной диагностики. Слабый скрежет или гул может быть невероятно трудно обнаружить в шумном моторном отсеке, так как звук может распространяться и отражаться неверными путями. Стетоскоп механика - простой, но мощный инструмент, который помогает справиться с этой проблемой.
- Как это работает: Стетоскоп работает за счет изоляции звука. Металлический зонд на конце передает вибрации непосредственно на наушники, минуя окружающий шум. Прикасаясь зондом к различным компонентам, вы можете определить, какой из них является истинным источником звука.
- Применение для крепления двигателя: При работающем двигателе и наличии исследуемого шума осторожно прикоснитесь зондом стетоскопа непосредственно к металлическому корпусу каждой опоры двигателя. Затем прикоснитесь к близлежащим компонентам, таким как кронштейн генератора, насос гидроусилителя руля или сам блок двигателя. Если шум становится значительно громче и отчетливее, когда щуп находится на конкретном креплении двигателя, значит, вы нашли виновника. Это особенно эффективно для определения вышедшего из строя подшипника в ведомом шкиве по сравнению с дребезжанием развалившейся гидравлической опоры, которые могут звучать очень похоже на расстоянии.
Введение в анализ вибраций
Для высококлассных диагностических мастерских или автопарков, занимающихся постоянными и труднодиагностируемыми проблемами NVH, приборы для анализа вибраций предлагают максимальные диагностические возможности. В этих приборах используются акселерометры - чувствительные электронные датчики - для измерения частоты и амплитуды вибраций в различных точках автомобиля.
- Наука о подписях: Каждый вращающийся или возвратно-поступательно движущийся компонент автомобиля создает вибрацию с характерной частотой. Дисбаланс шин создает вибрацию на частоте, связанной со скоростью вращения колеса. Дисбаланс карданного вала создает вибрацию на другой частоте. Импульс от работы двигателя создает еще одну. Программное обеспечение для анализа вибрации может получать данные с акселерометров и отображать их в виде спектра, показывая амплитуду вибрации на каждой частоте.
- Диагностика креплений: Неисправная опора двигателя изменяет характер вибрации автомобиля. Оно не сможет гасить основную частоту работы двигателя, что приведет к большому "всплеску" в спектре на этой частоте при измерении на раме или в кабине. Сравнивая сигнатуру вибрации на блоке двигателя с сигнатурой на раме, аналитик может точно определить, насколько эффективно (или неэффективно) опоры двигателя изолируют вибрации двигателя'. Эти объективные данные исключают все догадки и являются золотым стандартом диагностики NVH. Хотя этот уровень анализа выходит за рамки большинства рутинных проверок, понимание его существования является частью полного образования в этой области.
Эти передовые методы превращают процесс проверки крепления двигателя из чисто физической задачи в многоуровневое исследование, включающее электронику, акустику и физику.
Шаг 5: Интерпретация полученных результатов и принятие решения о дальнейших действиях
Предыдущие шаги были посвящены сбору данных. Вы собирали данные с помощью органов чувств - зрения, слуха и осязания - и, возможно, с помощью электронных диагностических инструментов. Теперь наступает решающий когнитивный этап: синтез. Вы должны собрать эти отдельные фрагменты данных в целостный диагноз и сформулировать логичный план действий. Именно здесь на первый план выходят опыт и здравое суждение.
Обобщение доказательств
Проанализируйте результаты каждого этапа проверки. Подтверждают ли различные доказательства друг друга? Мощный диагноз строится на фундаменте из множества последовательных показателей.
- Дело ясное: Вы увидели большой разрыв в резине крепления со стороны пассажира (шаг 2). При проверке тормозов с усилителем двигатель резко приподнялся с этой стороны при движении задним ходом (шаг 3). Используя выколотку, вы почувствовали значительный люфт в этом же креплении (шаг 3). Это простой диагноз. Крепление вышло из строя и требует замены.
- Тонкое дело: Визуальный осмотр не выявил ничего очевидного. Крепления выглядят неповрежденными. Однако вы испытываете постоянную, раздражающую вибрацию рулевого колеса на холостом ходу. Проверка тормозов с усилителем показала лишь незначительное движение, которое вы считаете нормальным. Это более сложная ситуация. Возможно, резина затвердела с возрастом, потеряв свои демпфирующие свойства без видимых трещин. Или, если это гидроусилитель, он мог потерять жидкость в результате очень медленного просачивания, которое не было очевидным, или его внутренние клапаны могли выйти из строя. В этом случае субъективный симптом (вибрация) является самым сильным доказательством. Учитывая относительно низкую стоимость креплений по сравнению с трудозатратами на повторную диагностику, замена часто является наиболее разумным решением.
- Противоречивый случай: Вы слышите громкий лязг, но все крепления выглядят идеально и плотно прилегают друг к другу. Проверка тормозов с усилием показывает минимальное движение двигателя. Здесь необходимо расширить диагностический поиск. Стук может исходить от изношенного компонента подвески, ослабленной поперечины, проблемы в трансмиссии или неисправного U-образного шарнира в трансмиссии. Тщательная проверка креплений двигателя не привела к неудаче; она успешно исключила их как причину, позволив вам сосредоточить внимание на другом. Это также является успехом диагностики.
Дилемма "один или все": замена креплений
Если вы убедились, что хотя бы одна опора двигателя вышла из строя, следующий вопрос - заменить только вышедшую из строя опору или заменить все опоры в сборе.
С точки зрения долгосрочного здоровья автомобиля и комплексного технического обслуживания почти всегда рекомендуется Замените опоры двигателя и трансмиссии в сборе. Вот как это объясняется:
- Общая продолжительность жизни: Все крепления на вашем автомобиле были установлены в одно и то же время и подвергались одинаковому пробегу, тепловым циклам и нагрузкам. Если одно из них вышло из строя из-за возраста и усталости, остальные, скорее всего, не отстают. Замена только одного заметно вышедшего из строя крепления часто является лишь временным решением, и через несколько месяцев вы можете повторить трудоемкую работу по замене другого.
- Соблюдение центровки трансмиссии: Система крепления двигателя и трансмиссии предназначена для фиксации силового агрегата на определенной высоте и под определенным углом. Такое выравнивание критически важно для правильной работы трансмиссии, ШРУСов (на переднеприводных или полноприводных автомобилях) и выхлопной системы. Когда вы устанавливаете одно совершенно новое, полноразмерное крепление рядом со старыми, просевшими, сжатыми креплениями, вы фактически создаете новые напряжения в системе. Силовой агрегат будет сидеть под небольшим углом, что может ускорить износ U-образных шарниров, уплотнений трансмиссии и гибких труб выхлопной системы. Замена всех элементов сразу гарантирует возвращение всего узла в правильное положение, предусмотренное заводом-изготовителем.
- Восстановление сбалансированного демпфирования: Крепления также разработаны для совместной работы в качестве настроенной системы для контроля вибраций. Новое, податливое крепление будет иметь другие характеристики демпфирования, чем старое, закаленное. Смешивание нового и старого может привести к непредсказуемому поведению NVH, когда одни вибрации гасятся, а другие нет. Полный комплект высококачественные запасные компоненты крепления двигателя восстанавливает баланс системы'.
Хотя первоначальные затраты выше, замена креплений в комплекте в долгосрочной перспективе более выгодна, если учесть экономию на повторных трудозатратах и предотвращение побочных повреждений других дорогостоящих деталей грузовика.
Важность качественных запасных частей
Последний кусочек головоломки - выбор правильных запасных частей. В мире коммерческого транспорта, где надежность напрямую связана с рентабельностью, это не то место, где можно срезать углы. Рынок наводнен деталями разного качества, и их выбор имеет первостепенное значение.
- OEM против вторичного рынка: Запчасти OEM (Original Equipment Manufacturer) по определению идентичны тем, что были установлены на заводе. Они гарантированно подходят и работают так, как задумано. Однако высококачественные производители запчастей часто выпускают детали, которые соответствуют или даже превосходят спецификации OEM. Они могут использовать передовые материалы или улучшенные конструкции, основанные на анализе общих точек отказа оригинальных деталей.
- Что определяет качество? В опоре двигателя качество сводится к двум вещам: металлургии корпуса и, что самое важное, составу резины или конструкции гидравлической системы. В низкокачественном креплении может использоваться некачественная резиновая смесь, которая затвердевает и трескается раньше времени, или корпус из хрупкого металла, который может сломаться под нагрузкой. Для компонентов, которые работают в условиях высоких температур и вибраций, материаловедение - это главное. Всегда рекомендуется приобретать компоненты у авторитетного поставщика, который специализируется на полный каталог решений для монтажа двигателей и могут предоставить информацию о материалах и стандартах тестирования своей продукции.
Процесс проверки крепления двигателя заканчивается не тогда, когда вы нашли проблему, а когда вы реализовали долговечное и качественное решение, которое восстановило безопасность, комфорт и надежность автомобиля'.
Часто задаваемые вопросы (FAQ)
Как долго обычно служат опоры двигателя на грузовых автомобилях?
Срок службы опор двигателя может значительно варьироваться в зависимости от нескольких факторов. В целом, комплект качественных опор двигателя на коммерческом грузовике может прослужить от 80 000 до 240 000 километров (примерно 50 000-150 000 миль). Ключевыми факторами, влияющими на это, являются тип крепления (гидравлические крепления могут иметь меньший срок службы, чем цельнорезиновые), условия эксплуатации (городская езда с частыми остановками и стартами оказывает большую нагрузку на крепления, чем движение по шоссе), качество дорог и воздействие таких агрессивных элементов, как дорожная соль или сильная жара. Регулярный осмотр более важен, чем строгий интервал замены.
Может ли плохое крепление двигателя вызвать загорание лампы "Check Engine"?
Да, это возможно, особенно в современных грузовиках. В то время как простое вышедшее из строя резиновое крепление не вызовет прямого включения света, плохое активное/электронное крепление, безусловно, может это сделать. Эти крепления оснащены датчиками и исполнительными механизмами, подключенными к ЭБУ автомобиля'. Если ЭБУ обнаружит неисправность в цепи или работе крепления, он запишет диагностический код неисправности (DTC) и включит лампу "Check Engine" или индикатор неисправности (MIL). Кроме того, сильное движение двигателя из-за любого типа неисправного крепления может привести к повреждению других датчиков, таких как кислородные датчики или датчики стука, что также приведет к загоранию лампы.
Безопасно ли ездить с плохим креплением двигателя?
Езда с незначительно изношенной опорой двигателя, вызывающей лишь незначительную вибрацию, как правило, не представляет непосредственной угрозы безопасности, но ее следует незамедлительно устранить. Однако езда с полностью сломанной или отделившейся опорой двигателя крайне опасна. Чрезмерное движение двигателя может привести к потере контроля над дроссельной заслонкой, повреждению шлангов системы охлаждения, приводящему к перегреву, обрыву электропроводки или удару вентилятора охлаждения о радиатор. В худшем случае сильное смещение веса может повлиять на управляемость автомобиля. Если вы подозреваете серьезную поломку крепления, лучше всего отбуксировать автомобиль в ремонтный центр.
В чем разница между опорой двигателя и опорой трансмиссии?
Функционально они являются частью одной и той же системы, предназначенной для поддержки всего силового агрегата (двигателя и трансмиссии) и поглощения вибраций. Основное различие заключается в их расположении. Опоры двигателя расположены на самом блоке двигателя, поддерживая его вес и контролируя его первичное перемещение. Опора трансмиссии находится в задней части трансмиссии, поддерживая ее вес и играя ключевую роль в управлении передне-задним ходом и вращательным моментом всего узла. Все они являются частью единой, продуманной системы, поэтому рекомендуется проверять и часто заменять их в сборе.
Сколько обычно стоит замена опор двигателя?
Стоимость может сильно варьироваться в зависимости от марки и модели грузовика, типа требуемых креплений и расценок на работу в вашем регионе. Стоимость самих деталей может варьироваться от менее сотни долларов за простое резиновое крепление до нескольких сотен долларов за одно современное гидравлическое или активное крепление. Основной ценой часто является труд, поскольку замена креплений может быть интенсивной работой, требующей безопасного подъема и поддержки двигателя. Замена всего комплекта на коммерческом грузовике может потребовать значительных инвестиций, но они гораздо меньше, чем стоимость ремонта сопутствующих повреждений, таких как разрушенная трансмиссия или радиатор, которые может вызвать неисправное крепление.
Могу ли я самостоятельно выполнить процедуру 'как проверить крепление двигателя'?
Визуальный осмотр и даже осторожная проверка с помощью шила могут быть выполнены знающим и заботящимся о безопасности владельцем. Однако для более динамичных испытаний, таких как проверка тормозов с усилителем, требуется помощник и четкое понимание связанных с этим рисков. Проверка двигателя домкратом также требует надлежащего оборудования и знания безопасных процедур подъема. Если вы не уверены в своих механических способностях или не имеете надлежащего защитного оборудования (особенно мощных подставок для домкрата), всегда лучше доверить проверку и последующий ремонт квалифицированному профессиональному технику.
Последние размышления
Мы путешествовали по запутанному миру опоры двигателя грузового автомобиля, переходя от ее фундаментального назначения в области физики к практическим действиям по диагностике. В ходе этого исследования выяснилось, что проверка опоры двигателя - это не просто механическая задача; это упражнение на умение слушать язык автомобиля, интерпретировать его признаки бедствия и методично и обоснованно реагировать. Вибрации, стуки и содрогания - это не просто раздражение, это сообщения о состоянии критической связи - связи между мощностью двигателя и целостностью рамы. Научившись тщательно и точно проверять крепление двигателя, вы не просто почините деталь, вы восстановите баланс всей системы, обеспечив долговечность других компонентов, от трансмиссии до деликатной электроники. Вы поддерживаете стандарт безопасности и надежности, который является основой индустрии коммерческого транспорта. Такое пристальное внимание к, казалось бы, простому компоненту на самом деле является подтверждением более глубокой приверженности механическому совершенству и эксплуатационной безопасности.
Ссылки
Агентство по стандартам для водителей и транспортных средств. (2025, 28 апреля). Обеспечение безопасности вождения коммерческих автомобилей (дорожная пригодность). GOV.UK. Извлечено из
Иноуэ, К. (2021). Разработка активной системы крепления двигателя для дальнейшего улучшения NVH. Технический документ SAE 2021-01-0495.
Джазар, Г. Н. (2017). Динамика транспортных средств: Теория и применение (3-е изд.). Springer.
Комацу. (2025). Ходовая часть: Советы по обслуживанию. Komatsu Ltd. Извлечено из