.png)
.png)


An Expert Guide to LS Engine Swap Motor Mounts: 5 Key Checks for a Flawless 2025 Build
December 5, 2025
Abstract
The selection of appropriate motor mounts is a foundational aspect of any successful LS engine swap, yet it is often underestimated in the planning stages. This analysis examines the multifaceted role of LS engine swap motor mounts beyond simply securing the engine to the vehicle's chassis. It explores the critical functions of vibration dampening, torque management, and the preservation of drivetrain alignment. A detailed comparison of mount materials—including rubber, polyurethane, and solid metal—is presented, evaluating their respective properties concerning durability, performance, and impact on Noise, Vibration, and Harshness (NVH). The discussion extends to the mechanical considerations of chassis compatibility, differentiating between bolt-in and weld-in solutions, and the geometric implications of engine placement. The profound effect of mount selection on drivetrain angles, accessory clearance, and long-term component reliability is also investigated. This guide provides a comprehensive framework for enthusiasts and professional builders, particularly in global markets like Europe and Southeast Asia, to make informed decisions, ensuring a reliable and well-engineered vehicle conversion for 2025 and beyond.
Key Takeaways
- Proper LS engine swap motor mounts are vital for drivetrain alignment and longevity.
- Material choice—rubber, polyurethane, or solid—directly impacts vibration and performance.
- Verify chassis compatibility for bolt-in kits or plan for custom fabrication.
- Correct engine placement affects oil pan, transmission, and accessory clearances.
- Always use high-grade hardware and proper torque specifications during installation.
- Factor in exhaust heat exposure, using heat shields to protect mounts.
- Regularly inspect mounts for wear, cracks, or loose fasteners after the swap.
Table of Contents
- The Foundational Role of Motor Mounts in an LS Swap
- Check 1: Material Science – Choosing Your Mount's Composition
- Check 2: Chassis Compatibility – Bridging the Gap Between Engine and Frame
- Check 3: Drivetrain Alignment – The Unseen Axis of Power
- Check 4: LS Engine Generation and Accessory Drive Compatibility
- Check 5: Installation and Long-Term Durability Checks
- Frequently Asked Questions (FAQ)
- Conclusion
- References
The Foundational Role of Motor Mounts in an LS Swap
Embarking on an LS engine swap is a project filled with exciting decisions. You choose the perfect engine, perhaps a robust iron-block 6.0L LQ4 pulled from a truck or a lightweight all-aluminum LS3 destined for high-revving performance. You plan the fuel system, the wiring, the exhaust. Amidst these high-profile choices, a smaller, less glamorous component often waits in the background: the motor mount. It is easy to perceive these parts as simple brackets, mere intermediaries whose only job is to hold the engine in place. Such a view, however, is a profound underestimation of their function. The motor mounts are not just passive supports; they are dynamic, engineered components that form the very bedrock of a successful, reliable, and enjoyable engine conversion. They are the critical link that negotiates the relationship between a powerful, vibrating engine and the vehicle's static frame. Getting this choice right ensures your project feels like a factory-built performance car, while getting it wrong can lead to a cascade of frustrating, expensive, and potentially dangerous problems.
Beyond Just Holding the Engine
Imagine trying to write a letter on a table that is constantly shaking. Your handwriting would be messy, your focus would be broken, your pen might even skip and tear the paper. The engine mounts perform a similar steadying function for your vehicle's entire drivetrain. Their role can be understood through three primary responsibilities.
First, they bear the entire static weight of the engine and often the transmission. An all-aluminum LS1 weighs over 400 lbs (about 180 kg), while an iron-block variant can exceed 500 lbs (about 227 kg). The mounts must support this load indefinitely without sagging or failing.
Second, they must manage the engine's torque. When you press the accelerator, the engine's crankshaft rotates with immense force. Due to Newton's third law, the engine block tries to rotate in the opposite direction. The motor mounts are the components that resist this twisting motion, planting the engine firmly so that power is transferred through the transmission to the wheels, not wasted by the engine trying to jump out of the engine bay. A soft or failing mount will allow excessive engine movement, which can feel like a sloppy throttle response or a disconcerting 'thump' under acceleration.
Third, and perhaps most importantly for a street-driven vehicle, motor mounts are responsible for isolating vibrations. A running internal combustion engine is a constant source of vibration. Without effective dampening, these vibrations would travel directly into the vehicle's frame, turning the cabin into an unpleasant echo chamber of mechanical noise and harshness. The mounts act as a filter, absorbing the worst of these vibrations to provide a comfortable driving experience.
The Physics of Torque and Vibration
To truly appreciate the function of LS engine swap motor mounts, one must consider the forces at play. A V8 engine, by its very nature, generates complex vibrational patterns. Each of the eight power strokes creates a pulse of energy. While a V8's cross-plane crankshaft design is inherently smoother than many four-cylinder engines, it still produces primary and secondary rotational forces that cause the engine to shake and oscillate. The material and design of the motor mount are engineered to absorb a specific range of these frequencies.
Think of it like the suspension on a bicycle. A rigid frame with no suspension transfers every single bump from the road directly to the rider. It is efficient but brutally uncomfortable. A full-suspension mountain bike, conversely, uses shocks to absorb those impacts, isolating the rider from the rough terrain. Rubber motor mounts are like that full-suspension bike, prioritizing comfort. Solid metal mounts are like the rigid frame, prioritizing the direct transfer of energy at the expense of any isolation. Polyurethane mounts fall somewhere in between, acting like a hardtail bike with only front suspension—a balance of performance and comfort.
The management of torque is equally physical. The force an engine produces is not just a number on a dynamometer sheet; it is a violent twisting motion. A stock 5.3L LM7 might produce over 300 lb-ft of torque. A modified, supercharged LS3 could easily generate more than 600 lb-ft. The motor mounts must act as an anchor against this rotational force. The passenger-side mount is typically under tension during acceleration, while the driver-side mount is under compression. Failure of a mount under these loads can cause the engine to lift dramatically, potentially damaging the hood, wiring, coolant hoses, or exhaust components.
Consequences of Improper Mount Selection
Selecting the wrong LS engine swap motor mounts is not a minor mistake. It is a foundational error that can jeopardize the entire project. The consequences range from minor annoyances to catastrophic failures.
One of the most common issues is excessive Noise, Vibration, and Harshness (NVH). Choosing a mount that is too stiff for a daily driver, like a solid or a very high-durometer polyurethane mount, will transmit every shudder of the engine into the cabin. At idle, the steering wheel might buzz in your hands. At cruising speed, a persistent drone could fill the interior, making long drives exhausting.
Drivetrain misalignment is a more insidious problem. If the motor mounts position the engine too high, too low, or at an incorrect angle, it disrupts the carefully calculated geometry of the entire drivetrain. This can lead to severe vibrations from the driveshaft, as its universal joints are forced to operate at angles they were not designed for. Over time, this incorrect angle will cause premature failure of the U-joints, the transmission output shaft bearing, or the rear differential's pinion bearing. These are not simple or inexpensive repairs.
Component stress is another major concern. An engine that moves excessively due to soft or worn-out mounts puts a constant strain on everything attached to it. Flexible exhaust headers can crack from the repeated movement. Coolant hoses can be pulled or abraded. Wiring harnesses can be stretched or chafed, leading to baffling electrical issues. In extreme cases, the shifting engine can even cause the cooling fan to make contact with the radiator, resulting in an immediate and total loss of the cooling system. Therefore, the choice of LS engine swap motor mounts is not merely about fitment; it is about engineering the dynamic heart of your vehicle correctly from the very beginning.
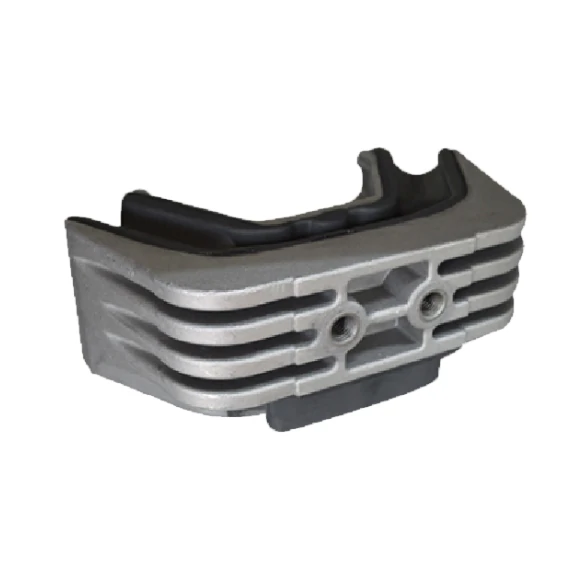
Check 1: Material Science – Choosing Your Mount's Composition
The material from which a motor mount is constructed is the primary determinant of its behavior. It dictates the balance between performance and comfort, between a planted feel and a serene cabin. The choice is not as simple as 'good' or 'bad'; it is about matching the material's inherent properties to your specific application and tolerance for NVH. The three most common materials are rubber, polyurethane, and solid metal, each occupying a distinct point on the spectrum of stiffness and vibration damping.
The Gentle Giant: Factory-Style Rubber Mounts
Factory-style rubber mounts are the unsung heroes of daily-driven vehicles. Automotive manufacturers spend millions of dollars on research to develop rubber compounds that provide the best possible isolation from engine vibrations. These mounts are often complex in their construction, sometimes containing fluid-filled cavities or internal voiding designed to absorb vibrations across a wide range of frequencies.
The principal advantage of rubber is its excellent damping capability. It acts like a sponge for vibrations, ensuring that the engine's mechanical commotion does not intrude upon the passenger compartment. For a vehicle that will be used for daily commuting, long road trips, or as a comfortable cruiser, rubber is almost always the superior choice. It provides a level of refinement that stiffer materials cannot replicate.
However, this comfort comes at a cost. Rubber is the least durable of the common mount materials. It is susceptible to degradation from heat, oil, and ozone. Over time, it can soften, crack, or tear, leading to excessive engine movement. In a high-performance context, the softness of rubber can be a detriment. Under hard acceleration, a rubber mount will deflect, allowing the engine to twist. This movement can slightly delay the feeling of power reaching the wheels and can contribute to wheel hop or an unsettled feeling in the chassis. For a stock or mildly modified LS engine in a street car, these drawbacks are minimal. For a high-horsepower or track-focused build, they become more pronounced.
The Firm Handshake: Polyurethane Mounts
Polyurethane represents the most popular middle-ground for performance-oriented street vehicles and dual-purpose cars. It is a polymer that offers a significant increase in stiffness and durability compared to rubber, without the extreme harshness of a solid mount. Think of it as a firm, confident handshake versus rubber's softer clasp.
One of the key characteristics of polyurethane is its durometer, which is a measure of its hardness. Polyurethane for motor mounts is available in a range of durometer ratings, typically from a softer 60A to a very firm 95A. A lower number indicates a softer material that will absorb more vibration, while a higher number indicates a stiffer material that will provide better engine control. This allows for a degree of tuning; a builder can select a 70A durometer for a spirited street car or an 85A for a weekend track car.
The primary benefit of polyurethane is its control over engine movement. Its stiffness drastically reduces the amount the engine can twist under load, resulting in a more direct throttle response and a more connected feel. It is also far more resistant to oil, chemicals, and heat than rubber, giving it a much longer service life in a demanding engine bay. Many high-performance engine mounts utilize polyurethane for this ideal balance of durability and performance.
The trade-off is an increase in NVH. While polyurethane does absorb some vibration, it will transmit noticeably more harshness into the chassis than rubber. The level of this increase depends heavily on the durometer of the poly, the specific vehicle, and the idle characteristics of the engine. An LS with an aggressive camshaft that has a rough idle will feel much more intense with polyurethane mounts. For many enthusiasts, this slight increase in mechanical feedback is a welcome part of the performance experience. For others, it can be an unwelcome annoyance.
The Unyielding Grip: Solid and Billet Aluminum Mounts
Solid motor mounts, typically made from steel or billet aluminum, are the ultimate solution for engine control. They offer a rigid, unyielding connection between the engine and the frame. There is no flex, no deflection, and no wasted motion.
Their purpose is singular: to lock the engine in place as if it were a stressed member of the chassis itself. This is the choice for dedicated racing applications—drag racing, road racing, or drifting—where every fraction of a second counts. By eliminating engine movement, solid mounts ensure that 100% of the engine's torque is instantly reacting against the drivetrain. They provide the most direct and responsive feel possible. They are also incredibly strong and are essentially immune to failure from power or torque, unlike their flexible counterparts.
The drawback is absolute and severe: all engine vibration is transmitted directly into the frame. There is no damping. There is no isolation. A car with solid mounts will feel raw and mechanical. The interior will buzz, panels will rattle, and every pulse of the engine will be felt through the seat and steering wheel. It is a fatiguing and often unpleasant experience for anything other than short-duration racing. Furthermore, by transferring all of this vibrational energy to the chassis, solid mounts can, over time, place stress on the vehicle's frame, subframe, and even the engine block itself, potentially leading to stress cracks in a chassis not prepared for such loads. They are a specialized tool for a specific job, and that job is not driving on public roads.
| Feature | Rubber Mounts | Polyurethane Mounts | Solid/Billet Mounts |
|---|---|---|---|
| Vibration Damping | Excellent | Fair to Good | None |
| Durability | Fair | Excellent | Maximum |
| Performance Feel | Soft / OEM | Firm / Responsive | Rigid / Instant |
| Cost | Low | Moderate | Moderate to High |
| Primary Application | Daily Drivers, Restorations | Performance Street, Autocross | Dedicated Race Cars |
| NVH Level | Very Low | Low to Moderate | Very High |
Check 2: Chassis Compatibility – Bridging the Gap Between Engine and Frame
Placing a General Motors LS engine into the engine bay of a vehicle from another manufacturer, or even an older GM vehicle, is a feat of mechanical matchmaking. The engine and the chassis were not designed for each other. The motor mounts serve as the critical adapter, the bridge that spans the gap between the engine's mounting bosses and the vehicle's frame rails or subframe. Achieving a perfect fit is a puzzle of geometry, involving adapter plates, specific mount designs, and precise placement to ensure clearances for all other components.
The Universal vs. The Specific: An Examination of Adapter Plates
The genius of the LS engine family is its consistent three-bolt mounting pattern on the sides of the block (though with some variations between generations, as we will discuss later). This provides a standard starting point. The challenge is that the vehicle's frame has its own unique mounting points. Adapter plates are the most common solution to this problem.
These plates are typically flat pieces of steel or aluminum, CNC-machined with two sets of holes. One set of holes matches the three-bolt pattern on the LS engine block. The other set of holes is positioned to accept a common, traditional-style motor mount, such as the classic Small Block Chevy (SBC) clamshell mount. By bolting the plate to the LS engine, you effectively convert its mounting pattern to that of an older, more established engine. This allows you to use readily available, off-the-shelf SBC motor mounts to connect to the vehicle's frame, assuming the vehicle was originally designed for an SBC or has been modified to accept one.
LS swap adapter plates are available in various configurations. Some offer a single, fixed position. Others are machined with multiple hole patterns, allowing the engine to be placed in a stock location, or moved forward or backward by an inch or more. This adjustability is invaluable for fine-tuning the fitment of the transmission, driveshaft, and accessories.
Bolt-In Swap Mounts: The Path of Least Resistance
For popular swap platforms, the aftermarket has provided a more elegant solution: vehicle-specific, bolt-in LS engine swap motor mounts. These are complete kits designed to make the installation as straightforward as possible. Instead of using a generic adapter plate and a traditional mount, these kits consist of custom-fabricated engine-side and frame-side brackets that are designed to bolt directly into factory holes.
For example, if you are swapping an LS engine into a BMW E46 chassis, you can purchase a kit that includes engine mounts that bolt to the LS block and fit perfectly onto the E46 front subframe's mounting studs. No drilling or welding is required. These kits are the result of extensive research and development, with manufacturers digitally scanning engine bays and designing the mounts to place the engine in the optimal position for oil pan clearance, steering rack clearance, and transmission alignment.
While bolt-in kits are more expensive than a universal adapter plate setup, they save an immense amount of time and eliminate guesswork. They are the recommended path for any swap where a well-regarded kit is available. Popular applications with strong bolt-in support include the Mazda RX-7 (FD), Nissan 240SX (S13/S14), classic Chevrolet C10 trucks, and many older muscle cars.
Weld-In Solutions: For the Custom Fabricator
In some cases, a bolt-in solution simply does not exist. This is common for more obscure chassis, full-custom tube-frame builds, or when placing the engine in a non-standard position for better weight distribution in a race car. In these situations, weld-in mounts are the answer.
Weld-in solutions typically involve fabricating custom mounting pads or "perches" on the vehicle's frame rails. The process starts by positioning the engine and transmission assembly in the desired location within the engine bay, supported by hoists and jacks. Once the ideal position is achieved—checking for clearances everywhere—the fabricator measures and creates custom brackets to connect the engine mounts to the frame. These brackets are then carefully welded into place.
This process requires significant fabrication skills, including precise measuring, cutting, and welding. It is not a task for a novice. It is also an opportunity to strengthen the chassis. When welding in new mounts, it is common practice to add gussets or boxing plates to the frame to help distribute the load and torque of the new, more powerful engine. While it is the most labor-intensive option, it offers complete control over engine placement and is the only viable method for truly custom builds.
Understanding Engine Placement: The Fore/Aft Dilemma
The position of the engine, even by as little as one inch (25mm) forward or backward, has a ripple effect throughout the entire vehicle. The choice of motor mounts or the adjustability in your adapter plates dictates this position.
Moving the engine forward can provide more firewall clearance for larger transmissions or for easier access to the back of the engine. However, it also moves weight over the front axle, which can negatively impact handling. It may also require a longer driveshaft.
Moving the engine rearward is often desirable for better weight distribution, leading to improved handling balance. This is a common goal in road racing or drifting builds. The downside is that it can create clearance issues with the firewall, transmission tunnel, and the stock shifter location. It will also require a shorter driveshaft. The choice of oil pan is intimately tied to engine position, as the front subframe or steering rack must clear the pan's sump. Careful planning is required to ensure all components coexist peacefully.
| Placement | Pros | Cons | Key Considerations |
|---|---|---|---|
| Forward Position | More firewall/transmission clearance. | Worse weight distribution (front-heavy). | Requires longer driveshaft. May impact radiator/fan clearance. |
| Stock Position | Often the easiest for component fitment. | May not be optimal for weight balance. | A good baseline for most street swaps. |
| Rearward Position | Improved weight distribution/handling. | Less firewall/transmission clearance. | Requires shorter driveshaft. May require tunnel modification. |
Check 3: Drivetrain Alignment – The Unseen Axis of Power
Of all the technical considerations in an LS swap, drivetrain alignment is one of the most critical and most frequently overlooked. You can have a perfectly balanced engine and the strongest mounts, but if the angle of your engine and transmission is not in harmony with the angle of your differential, the result will be ruinous vibrations and the rapid destruction of expensive components. The motor mounts set the starting point for this crucial geometric relationship. They establish the engine's height and its vertical angle, which everything else in the drivetrain must then align with.
The Critical Nature of Drivetrain Angle
Imagine two rotating shafts connected by a universal joint (U-joint), like the one on your driveshaft. If the two shafts are perfectly in line (a zero-degree angle), the U-joint doesn't have to do any work, but it also won't lubricate itself properly and will wear prematurely. If the angle is too great, the U-joint will bind and release with every rotation, creating a terrible vibration and failing very quickly.
For a smooth transfer of power, U-joints need to operate at a slight angle, typically between 1 and 3 degrees. The key principle is that the operating angles at both ends of the driveshaft should be equal and opposite. This is known as "canceling out the angles." If the transmission output shaft points down by 2 degrees, the differential pinion shaft should point up by 2 degrees. This parallel arrangement ensures that the speed fluctuations created by the front U-joint are canceled out by the rear U-joint, resulting in a smooth rotation.
When you install an LS engine, the motor mounts and transmission mount determine the angle of the transmission output shaft. This is your "drivetrain angle." If that angle is wrong, it becomes impossible to set up the rest of the system correctly, dooming you to vibrations that can be felt throughout the car, often starting at a specific speed and getting worse from there.
How Motor Mounts Dictate Engine Angle
The motor mounts are the primary determinant of the engine's angle. The height of the mounts relative to the chassis sets the vertical position of the crankshaft's centerline. A mount that sets the engine too high or too low will immediately create an alignment challenge. For example, if the mounts place the engine too high, the transmission output shaft will point downward at a steep angle, making it very difficult to achieve a corresponding parallel angle at the differential without using extreme shims or adjustable control arms.
Many LS swap mount kits are designed to place the LS crankshaft centerline at the same height as the original engine's crankshaft, which provides a good starting point for alignment. However, this is not always guaranteed, especially with universal kits or custom-fabricated mounts. It is the builder's responsibility to measure and confirm these angles. Even the choice of an oil pan can affect the engine's final height, as the engine may need to be raised slightly to clear the steering rack, which in turn alters the drivetrain angle.
Aligning with the Transmission and Differential
Achieving the correct drivetrain alignment is a systematic process. It begins with the engine angle set by the LS engine swap motor mounts. Once the engine is installed, the next step is to set the angle of the transmission. The transmission mount's height can be adjusted, often using shims or washers, to fine-tune the downward angle of the output shaft. The goal is to achieve a 2 to 3-degree downward slope.
With the engine and transmission angle set, attention turns to the rear axle. The angle of the differential's pinion yoke must be adjusted to be equal and opposite to the transmission's angle. If the transmission points down 2.5 degrees, the pinion should point up 2.5 degrees. In a leaf-spring vehicle, this is adjusted using angled shims placed between the leaf spring and the axle perch. In a 4-link or torque-arm suspension, this is adjusted by changing the length of the suspension links.
It is a process of measurement and adjustment. You measure the transmission angle, then adjust the pinion angle to match. It is a dance of geometry where the motor mounts lead the first step.
Tools and Techniques for Measurement
You cannot guess at drivetrain angles; they must be measured accurately. The essential tool for this job is a digital angle finder. This is a small, affordable device that can magnetically attach to a surface and provide a precise digital readout of its angle relative to gravity.
Here is a mental walk-through of the process:
- Ensure the vehicle is at its normal ride height with the suspension settled, and on a level surface.
- Place the angle finder on a machined vertical surface of the engine block or transmission case to measure the engine/transmission angle. Note the reading (e.g., 2.8 degrees down).
- Place the angle finder on the flat bottom of the driveshaft to measure its angle. Note the reading (e.g., 4.0 degrees down). The operating angle of the front U-joint is the difference between these two angles (4.0 – 2.8 = 1.2 degrees). This should be between 1 and 3 degrees.
- Place the angle finder on the flat face of the differential's pinion yoke. Note the reading (e.g., 2.0 degrees up).
- The operating angle of the rear U-joint is the difference between the driveshaft angle and the pinion angle. Since they are in opposite directions, you add them (4.0 down + 2.0 up is not how it works). The proper way is to find the angle of the pinion relative to the driveshaft. If the driveshaft is 4.0 degrees down and the pinion is 2.0 degrees up, the total operating angle is 6.0 degrees, which is too high. The goal is to make the pinion angle parallel to the engine/trans angle. If the engine/trans is 2.8 degrees down, the pinion should be 2.8 degrees up.
The final setup should have the engine/transmission and the pinion angles parallel, with the driveshaft connecting them at a slight angle. This ensures the U-joints operate smoothly, and your LS-swapped vehicle drives without any mysterious or destructive vibrations.
Check 4: LS Engine Generation and Accessory Drive Compatibility
The term "LS engine" is a broad label that encompasses several generations of GM's small-block V8, spanning from its introduction in the 1997 Corvette to the modern direct-injection LT engines. While they share a common architectural heritage, there are subtle yet significant differences between them, particularly in their physical mounting points and the configuration of their accessory drives. These differences can directly impact your choice of LS engine swap motor mounts and require careful consideration to avoid clearance issues and ensure all your accessories fit and function correctly.
A Brief History of LS Mounting Patterns: Gen III vs. Gen IV
The LS engine family is primarily divided into Generation III (1997-2007) and Generation IV (2005-2020). Both generations share the same fundamental three-bolt mounting pattern on each side of the engine block. This standardization is a primary reason for the platform's swap-friendliness.
However, there is one key difference. On all Gen III blocks (like the LS1, LS6, LM7, LQ4, LQ9) and some very early Gen IV blocks, the three mounting holes are drilled and tapped in the same plane. On the vast majority of Gen IV blocks (like the LS2, LS3, L99, LS7, L92), the forward-most hole on the driver's side (left-hand side) is offset slightly from the other two.
This small offset means that a motor mount or adapter plate designed for a Gen III engine will not bolt directly to a later Gen IV block without modification. Fortunately, the aftermarket has provided a simple and effective solution: adapter plates that are designed to accommodate both patterns. Many universal LS swap adapter plates are machined with four holes for the engine block instead of three. This allows the plate to bolt to either a Gen III block or a Gen IV block by simply using the correct set of three holes. When purchasing LS engine swap motor mounts or adapter plates, it is vital to confirm that they are compatible with your specific engine generation. This is a small detail that can bring a project to a grinding halt if overlooked.
Truck Engines vs. Car Engines: Mounting Boss Differences
Another important variation exists between LS engines originally installed in trucks/SUVs and those from cars. While the bolt pattern is the same (respecting the Gen III/IV difference), the height of the cast mounting boss on the engine block itself can differ.
Truck engines (such as the popular 4.8L, 5.3L, and 6.0L iron-block variants) often have a taller mounting boss that positions the engine higher in the chassis when used with standard mounts. Car engines (like the LS1, LS2, LS3) have a shorter boss. This difference can be problematic. If you are using swap mounts designed for a "car" LS engine but you are installing a "truck" engine, the engine may sit too high, causing hood clearance issues or poor drivetrain angles.
Again, the aftermarket offers solutions. Some swap mounts are designed specifically for the taller truck block. Alternatively, you can use specialized adapter plates that are designed to compensate for the height difference, effectively lowering the mounting point on the truck block to match the car block's position. It is another piece of the puzzle that requires you to know exactly which LS engine you have and to purchase mounts that are designed for that specific application.
Clearance for Accessories: Power Steering, AC, and Alternators
The placement of the engine's accessories—the alternator, power steering pump, and air conditioning compressor—is heavily influenced by the motor mounts. The mounts dictate the engine's lateral and vertical position, which determines the available space between the accessories and the vehicle's frame rails, steering box, or suspension components.
This is especially true for the A/C compressor. On many factory LS accessory drives, the A/C compressor is mounted very low on the passenger side of the engine. In many rear-wheel-drive swap applications, this low-mounted compressor will directly interfere with the frame rail or the front subframe. Your choice of motor mounts can sometimes help or hinder this. A mount that shifts the engine slightly rearward might provide the necessary clearance.
More often, the solution involves changing the accessory drive itself. Aftermarket companies offer "high-mount" accessory drive kits that relocate the A/C compressor and sometimes the alternator to a higher position on the engine, providing ample frame clearance. There are also different factory accessory drives. The drive from a Corvette spaces the accessories closest to the engine, the F-body (Camaro/Firebird) drive is slightly further out, and the truck drive is the furthest out. Your motor mount selection must work in concert with your chosen accessory drive to ensure everything fits within the confines of the engine bay. A mock-up of the engine with all its accessories installed is a wise step before finalizing the engine's position with weld-in mounts.
Check 5: Installation and Long-Term Durability Checks
The process does not end once you have selected the perfect LS engine swap motor mounts. Proper installation is paramount to their function and longevity, and a schedule of post-swap inspections is necessary to ensure the long-term health of your conversion. The forces acting on these components are immense, and a casual approach to installation can undermine even the highest quality parts. Similarly, treating the mounts as a "fit-and-forget" item is a recipe for future problems. Vigilance during installation and diligence in maintenance are the final steps to a truly robust and reliable LS swap.
The Art of the Torque Wrench: Proper Fastener Procedure
The bolts that hold your motor mounts to the engine and the chassis are some of the most highly stressed fasteners in the entire vehicle. They are subjected to shear forces, tension, and constant vibration. Using the correct hardware and tightening it to the proper specification is not optional; it is a safety requirement.
Always use high-grade hardware, typically Grade 8 (in the SAE system) or Class 10.9 (in the metric system). These bolts are heat-treated to withstand the immense forces without stretching or breaking. Never be tempted to reuse old, rusted, or non-graded bolts from a hardware store. The few dollars saved are not worth the risk of engine movement or catastrophic failure.
A torque wrench is an indispensable tool for this job. Every fastener has a specific torque value, a measure of its rotational tightness, specified by the mount manufacturer or in the vehicle's service manual. Under-tightening a bolt can allow it to loosen over time due to vibration, leading to sloppy engine placement or a rattling noise. Over-tightening a bolt can stretch it beyond its elastic limit, permanently weakening it and making it prone to snapping under load. It can also damage the threads in the engine block or chassis. Using a calibrated torque wrench ensures each bolt is applying the correct clamping force. For added security, a drop of medium-strength (blue) thread-locking compound is highly recommended on all motor mount bolts to prevent them from backing out due to vibration.
Pre-Installation Inspection of the Chassis
Before you bolt in your new engine, take a moment to carefully inspect the areas on the vehicle's frame or subframe where the new mounts will attach. These areas will now be subjected to forces they may not have been originally designed to handle, especially if you are swapping a powerful V8 into a car that originally came with a small four-cylinder engine.
Look for any signs of pre-existing damage. Are there any cracks in the metal, particularly around old weld seams or sharp corners? Is there any significant rust that could have compromised the structural integrity of the frame? If you are using a bolt-in kit, are the factory mounting holes and surrounding metal sound?
If you find any issues, they must be addressed before the engine goes in. Cracks should be stop-drilled at their ends to prevent them from spreading, then ground out and properly welded. Rusted sections should be cut out and replaced with fresh, strong steel. It is often a good idea to reinforce the mounting points, even if they look sound. This can be done by welding in doubler plates or gussets to help spread the load over a larger area of the frame. This ounce of prevention is far better than the pound of cure required to fix a frame that has torn after the swap is complete.
Post-Swap Inspection and Maintenance
Your work is not done when the engine fires up for the first time. The first few hundred miles are a critical break-in period for the entire vehicle, including the motor mounts. It is wise to perform a thorough inspection after the first 50-100 miles (about 80-160 km) and again after 500-1000 miles (about 800-1600 km).
During these inspections, re-check the torque on all motor mount fasteners. It is not uncommon for things to settle slightly, and a quick check with the torque wrench can catch a bolt that has started to loosen. Visually inspect the mounts themselves. For polyurethane mounts, look for any signs of the material "extruding" or being pushed out of its metal shell, which could indicate a problem with alignment or excessive force. For rubber mounts, look for any new tears or cracks.
Listen for any new noises. A 'clunk' during acceleration or shifting could indicate that a mount has failed or a bolt has come loose, allowing the engine to move excessively. After these initial break-in checks, a yearly inspection of the motor mounts should become part of your regular maintenance routine. This proactive approach ensures your LS swap remains as solid and reliable as the day you finished it.
Heat Management: Protecting Mounts from Exhaust Heat
Exhaust heat is the enemy of both rubber and polyurethane. The exhaust manifolds or headers on an LS engine can glow red hot under heavy load, radiating an incredible amount of thermal energy. If a motor mount is located close to a primary exhaust tube, this radiant heat will cook the mount, dramatically shortening its life.
Rubber will become hard and brittle, then crack and fail. Polyurethane will soften, deform, and can eventually melt. To prevent this, heat management is essential. The simplest solution is a heat shield. This can be a factory-style stamped metal shield or a custom piece made from reflective thermal barrier material. The shield is placed between the exhaust pipe and the motor mount, reflecting the radiant heat away. Some companies even offer thermal wraps or sleeves designed to slip directly over the body of the motor mount.
When planning your exhaust system, pay close attention to the proximity of the pipes to the mounts. Try to provide as much air gap as possible. For custom turbo builds, where the "hot side" plumbing is often routed creatively, this is even more critical. Protecting your mounts from heat is a simple step that pays huge dividends in reliability and longevity, preventing you from having to replace failed mounts on a regular basis. You can even find specialized custom engine mounting solutions that incorporate heat shielding directly into their design.
Frequently Asked Questions (FAQ)
Can I reuse old or factory motor mounts for my LS swap?
It is generally not recommended. While it may seem like a way to save money, factory mounts from the donor vehicle or the recipient vehicle are likely aged and worn. Rubber deteriorates over time, becoming brittle or soft. Reusing them means you are starting your new, powerful swap with a potential point of failure. New, high-quality mounts are a small investment that provides peace of mind and ensures the engine is properly supported and isolated from day one.
I installed polyurethane mounts and the vibration is too much. What can I do?
If the vibration is excessive for your comfort, you have a few options. First, verify that your engine is in a good state of tune; a misfire or a poorly balanced rotating assembly will cause excessive vibration that no mount can hide. Second, check your mount's durometer rating. If you used a very firm polyurethane (e.g., 85A or higher), swapping to a softer durometer (e.g., 70A) can make a noticeable difference. Third, ensure that no other parts are transmitting vibration; for instance, check that your exhaust is not touching the frame or crossmember. As a last resort, you may need to switch to high-quality rubber mounts to achieve the level of comfort you desire.
Do I need a new transmission mount when I do an LS swap?
Yes, absolutely. The motor mounts and the transmission mount work together as a three-point system to support and align the entire drivetrain. The transmission mount must be compatible with your chosen transmission (e.g., T56, 4L60E, 4L80E) and must work with your transmission crossmember to set the correct drivetrain angle. Using an old, worn, or incorrect transmission mount will compromise the alignment set by your new LS engine swap motor mounts.
What are the most common causes of premature motor mount failure?
Aside from old age, the most common causes are improper installation, oil contamination, and excessive heat. Bolts that are not torqued correctly can lead to shock loading that damages the mount. Engine oil is a solvent for natural rubber, so any significant oil leak that drips onto the mounts will cause them to soften and fail. Lastly, intense radiant heat from nearby exhaust headers will cook the rubber or polyurethane, making it brittle and causing it to crack and separate.
Are adjustable LS motor mounts worth the extra cost?
For many swaps, adjustable mounts can be incredibly valuable. They typically allow for forward and aft movement of the engine by an inch or more. This adjustability can be a lifesaver when trying to achieve perfect clearance for the oil pan, firewall, transmission, and accessories. If you are working with a common chassis that has a well-developed, fixed-position bolt-in kit, they may not be necessary. For more custom applications or when you want precise control over weight distribution, they are well worth the investment.
How do I know if my drivetrain angle is wrong?
The most common symptom of an incorrect drivetrain angle is a noticeable vibration that appears at a specific road speed, often between 40-60 mph (65-95 kph). The vibration may change or disappear under acceleration or deceleration. It feels like it is coming from the center or rear of the car. A visual inspection might show premature wear on U-joints. The only way to know for sure is to measure the angles of the transmission, driveshaft, and differential pinion using a digital angle finder.
Conclusion
The journey of an LS engine swap is a complex undertaking, a symphony of mechanical, electrical, and geometric considerations. Within this intricate process, the LS engine swap motor mounts play a role that is both foundational and dynamic. They are far more than simple brackets; they are the negotiators of force and vibration, the guardians of alignment, and the bedrock upon which the reliability of the entire conversion rests. From the careful selection of material composition to the precise geometry of engine placement, every decision related to these components has a cascading effect. A builder who approaches motor mounts with the same diligence and respect they afford the engine itself is setting a course for success. By understanding the science of the materials, ensuring compatibility with the chassis, obsessing over drivetrain alignment, planning for accessory fitment, and committing to proper installation and maintenance, you transform a collection of parts into a cohesive, refined, and thrilling machine. The correct mounts will not be the most visible part of your finished project, but their silent, steadfast work will be felt in every smooth idle, every crisp shift, and every trouble-free mile.
References
Caterpillar. (2021, October 25). Cat® undercarriage. Cat.com. Retrieved from
Energy Suspension. (n.d.). FAQ. Retrieved from
Hot Rod Network. (2018, February 26). How to choose the right motor mounts for your LS swap. MotorTrend. Retrieved from
Inland Empire Driveline Service. (n.d.). Driveline 101. Retrieved from
Larkin, T. J. (1998). The selection of rubber compounds for automotive applications. SAE Transactions, 107, 1373-1380.
LSxMag. (2023, June 14). A guide to LS engine swap motor mounts. Retrieved from
Spicer Parts. (n.d.). Driveshaft angle. Retrieved from
TractorZone. (2024, March 8). A complete guide to the world of undercarriage components. Retrieved from https://tractorzone.com/blog/a-complete-guide-to-the-world-of-undercarriage-components/
Wegst, U. G. K., Bai, H., Saiz, E., Tomsia, A. P., & Ritchie, R. O. (2015). Bioinspired structural materials. Nature Materials, 14(1), 23–36.
Weldbuilt. (n.d.). LS conversion motor mounts. Retrieved from https://www.weldbuilt.com/LS-Conversion-Motor-Mountsc12.html