.png)
.png)


Data-Backed Guide: When to Get Your Truck Engine Mounts Replaced & 3 Common Mistakes to Avoid in 2026
Abril 8, 2026
Resumo
The structural integrity and operational harmony of a heavy-duty truck are contingent upon the sophisticated interplay of its numerous components. Among these, the engine mount serves a foundational role, securing the powerhouse of the vehicle to its chassis while simultaneously mitigating the transfer of vibrational energy. This article presents a comprehensive examination of the procedures, symptoms, and material considerations pertinent to the event of having engine mounts replaced. It explores the diagnostic indicators of mount failure, including auditory cues, excessive vibration, and visible material degradation. A detailed analysis contrasts the properties and applications of rubber and polyurethane mounts, offering a framework for informed selection based on vehicle usage and performance expectations. The discourse extends to the potential cascading failures that arise from neglecting worn mounts, thereby articulating the economic and safety imperatives for timely intervention. By contextualizing this specific maintenance task within the broader system of vehicle mechanics, the article provides a deep, analytical resource for fleet managers, professional mechanics, and vehicle enthusiasts aiming to preserve vehicle longevity and performance.
Principais conclusões
- Identify failing mounts through excessive cabin vibration and loud clunking noises.
- Visually inspect mounts for cracks in the rubber or leaks from hydraulic units.
- Delaying replacement can cause severe damage to connected driveline components.
- Choose between rubber for comfort and polyurethane for performance and durability.
- A professional diagnosis is best to confirm the need for having engine mounts replaced.
- Proper installation is paramount for the safety and function of the new mounts.
- Consider the total cost of ownership, not just the upfront price of parts.
Índice
- The Unsung Hero: Understanding the Role of Engine Mounts in Your Truck
- The Telltale Signs: A Data-Backed Checklist for Identifying Failure
- The Diagnostic Deep Dive: Confirming the Need for Replacement
- The Crossroads of Choice: Selecting the Right Replacement Engine Mounts
- O processo de substituição: Um guia concetual passo a passo
- The Ripple Effect: 3 Common and Costly Mistakes to Avoid
- Beyond the Mounts: A Holistic View of Vehicle Stability and Longevity
- Perguntas frequentes (FAQ)
- Conclusão
- Referências
The Unsung Hero: Understanding the Role of Engine Mounts in Your Truck
Within the complex ecosystem of a modern truck, certain components perform their duties in quiet anonymity, their importance only becoming starkly apparent in the moment of their failure. The engine mount is a prime example of such a component. It is not a part that boasts of its contribution with the roar of an engine or the gleam of polished chrome, yet without it, the entire character of the vehicle would be fundamentally compromised. To truly grasp why getting your engine mounts replaced is not a trivial matter, one must first develop an appreciation for the elegant and demanding role these parts play.
What Exactly Are Engine Mounts? A Foundational Overview
At its most basic, an engine mount is the connective tissue between the two largest and most significant parts of your truck: the engine and the frame. Think of it as a specialized bracket with a critical mission. Its first job is structural: to hold the immense weight of the engine securely in place within the engine bay. An average commercial truck engine can weigh well over 1,000 kilograms (2,200 pounds), and these mounts must support that mass through every bump, turn, and acceleration.
Their second, and perhaps more nuanced, function is that of a damper. An internal combustion engine is, by its very nature, a source of intense vibration. The controlled explosions happening thousands of time per minute within the cylinders generate powerful oscillations. If the engine were bolted directly to the truck's frame, these vibrations would transfer directly into the chassis and cabin. The ride would be intolerably harsh, the noise deafening, and the constant shaking would quickly fatigue and damage other components throughout the vehicle. The engine mount contains a block of damping material—typically a specially formulated rubber or polyurethane—that absorbs these vibrations, isolating the chassis from the engine's inherent restlessness.
Finally, the mount must manage torque. When you accelerate, the engine twists in the opposite direction of the crankshaft's rotation. This rotational force, or torque, is substantial. The engine mounts must constrain this movement, allowing only a slight, controlled flex. If they did not, the engine could lurch violently, potentially damaging hoses, wiring, and even the transmission linkage. In essence, the engine mount negotiates a constant, dynamic peace treaty between the engine's power and the vehicle's structural stability.
A Tale of Two Components: The Engine and the Chassis
To better visualize this relationship, consider the analogy of a suspension bridge. The massive bridge deck, carrying all the traffic, represents the engine. The towering pylons, firmly rooted in the earth, represent the truck's chassis. The thick steel cables stretching between them are the engine mounts.
These cables do not form a rigid connection. They are designed to allow the bridge deck to move slightly, to sway in the wind and expand or contract with temperature changes. This flexibility is what allows the structure to withstand immense forces without breaking. If the deck were welded rigidly to the pylons, the first strong gust of wind or temperature shift would introduce catastrophic stress into the structure.
Similarly, engine mounts provide a strong yet flexible connection. They hold the engine's weight (the bridge deck) securely, but they also allow for the slight, controlled movements (the sway) caused by torque and vibration. This engineered "give" is what protects the entire system. When an engine mount fails, it is like one of those main suspension cables snapping. The load is no longer properly supported or distributed, and the entire structure is placed under immediate and dangerous strain.
The Anatomy of an Engine Mount: Materials and Design
The design of an engine mount is a masterclass in materials science and mechanical engineering, tailored to the specific demands of a vehicle. While they may appear simple from the outside, their internal construction is often quite sophisticated.
Suportes de borracha: This is the most common type found in passenger cars and many standard-duty trucks. The rubber is not just any rubber; it is a specific elastomer compound engineered for a precise balance of stiffness and damping, known as its durometer rating. Manufacturers spend considerable resources developing rubber compounds that can withstand constant vibration, extreme temperatures, and exposure to oil and other automotive fluids without degrading quickly. Their primary advantage is excellent vibration isolation, leading to a smoother, quieter ride.
Hydraulic (or Hydromounts): These are a more advanced version of the rubber mount. They look similar on the outside but contain a hollow chamber filled with a glycol-based fluid. Inside this chamber are intricate channels and a rubber diaphragm. As the engine vibrates, it pushes fluid back and forth through these channels. This action actively cancels out specific vibration frequencies, much like noise-canceling headphones cancel out sound waves. They offer superior damping compared to solid rubber, especially at idle and low RPMs, but are more complex and expensive. A leak is a definitive sign of failure.
Suportes de poliuretano: Often found in the aftermarket and performance sectors, polyurethane is a polymer that offers a different set of properties. It is significantly stiffer and more durable than rubber. This stiffness provides a much more direct connection between the engine and the chassis, resulting in sharper throttle response and a more "connected" feel. The trade-off is a noticeable increase in the transmission of noise, vibration, and harshness (NVH) into the cabin. For a heavy-duty work truck where performance and durability under extreme loads are prioritized over cabin comfort, they can be an excellent choice.
Active or Electronic Mounts: Found at the premium end of the spectrum, particularly in modern luxury trucks, these are the most advanced type. They are essentially hydraulic mounts that incorporate an electronically controlled actuator. The vehicle's Engine Control Unit (ECU) monitors engine speed and load in real-time and sends signals to the mount, which then actively stiffens or softens its damping characteristics to perfectly counteract vibrations across the entire RPM range. They provide the best of both worlds—smoothness at idle and firmness under acceleration—but are the most complex and costly to replace.
| Tipo de montagem | Primary Advantage | Primary Disadvantage | Best Suited For |
|---|---|---|---|
| Borracha maciça | Excellent vibration damping, low cost | Less durable than polyurethane, can soften over time | Daily drivers, light-duty trucks, comfort-focused applications |
| Poliuretano | High durability, superior torque resistance | Increased cabin noise and vibration (NVH) | Heavy-duty hauling, performance trucks, off-road vehicles |
| Hidráulico | Superior damping at idle, frequency-specific isolation | More expensive, can leak and fail completely | Standard-duty and luxury trucks where smoothness is key |
| Ativo/Eletrónico | Adaptive damping, optimal performance and comfort | Highest cost, complex diagnosis and replacement | High-end modern trucks with advanced ECU integration |
Understanding these fundamental principles is the first step toward recognizing the profound importance of this component. It is not merely a piece of metal and rubber; it is a finely tuned dynamic damper, a structural support, and a torque restraint all in one. Its health is directly tied to the performance, comfort, and longevity of your entire vehicle.
The Telltale Signs: A Data-Backed Checklist for Identifying Failure
An engine mount rarely fails catastrophically without warning. Instead, it typically degrades over time, offering a series of escalating clues to the attentive owner or operator. Learning to recognize these symptoms is not just a matter of mechanical aptitude; it is an exercise in listening to the language of your vehicle. Ignoring these early warnings is akin to ignoring a chronic, low-grade fever—it may seem minor at first, but it can be a harbinger of a more serious underlying condition that will eventually demand your attention. When the time comes for the engine mounts to be replaced, the signs will be there for those who know what to look for.
Symptom 1: The Symphony of Unwanted Noises
One of the most common and easily identifiable symptoms of a failing engine mount is the introduction of new, unsettling sounds into the vehicle's auditory landscape. These are not the familiar, rhythmic noises of a healthy engine but rather abrupt, jarring sounds that indicate something is amiss.
Clunking, Banging, or Thumping: These sounds are the classic signature of a worn or broken mount. They are most often heard during transitional states of engine load. You might hear a loud "clunk" when you shift from Park to Drive or Reverse. You may hear it when you accelerate sharply from a stop or when you abruptly let off the gas. This noise is the sound of the engine block physically shifting and making contact with the frame or another component because the mount is no longer holding it securely. The rubber or fluid that once cushioned this movement is gone, and you are hearing the raw impact of metal on metal. Think of it as a book falling off a shelf that was once held in place by a sturdy bookend; the noise is the result of a support failing.
Chocalho ou estalido: While less common than a loud clunk, a persistent rattling or ticking from a specific area of the engine bay can also point to a mount issue. This might be caused by a loose bolt on the mount bracket or by a piece of the separated mount vibrating against the engine or frame. This sound is often more noticeable at idle or at specific RPM ranges where the engine's natural frequency excites the loose component.
Symptom 2: The Tremor of Excessive Vibration
The primary job of an engine mount is to absorb vibration. Therefore, a logical consequence of its failure is a palpable increase in vibration felt throughout the vehicle. This symptom can manifest in several ways and often grows progressively worse over time.
Cabin Vibration at Idle: When your truck is stopped in gear, such as at a traffic light, do you feel an unusual amount of shaking through your seat or the floor? Does the dashboard or steering wheel seem to buzz more than it used to? A healthy set of mounts, especially hydraulic ones, are specifically tuned to cancel out the engine's vibrations at idle. When they wear out, their damping ability is compromised, and that raw engine vibration is transmitted directly into the chassis and, consequently, to you. This can be a subtle change at first, but comparing it to a similar, newer vehicle can often make the difference strikingly obvious.
Vibração sob carga: As you accelerate, the vibrations may change in intensity or frequency but will remain more pronounced than they should be. It might feel like the entire front of the truck is "rough" or "unsettled." This is because the engine's movements are no longer being smoothly absorbed. The experience can be fatiguing for the driver on long journeys and is a clear signal that the buffer between the engine and the frame has been breached. Research in vehicle dynamics has shown that driver comfort is directly linked to the effective isolation of powertrain vibrations, a task for which the engine mounts are chiefly responsible (Genta & Morello, 2009).
Symptom 3: Visual Clues of Degradation and Damage
Sometimes, the most definitive evidence requires a direct visual inspection. This may necessitate safely raising the vehicle and using a good flashlight, but the clues are often unambiguous. You are looking for physical evidence that the mount is no longer structurally sound.
Cracks, Tears, and Perished Rubber: For standard rubber mounts, the evidence will be in the condition of the rubber itself. Look for deep cracks that penetrate the surface. Check for areas where the rubber has torn or separated completely from the metal portions of the mount. The rubber may look "squashed" or deformed, having lost its original shape and resilience. Over time, exposure to heat, oil, and ozone causes the rubber to become brittle and lose its elasticity, leading to these physical failures.
Fugas de fluido: If your truck is equipped with hydraulic mounts, a clear sign of failure is a fluid leak. You may see a dark, oily residue coating the outside of the mount and the frame area directly beneath it. This indicates that the internal diaphragm has ruptured, and the damping fluid has escaped. A hydraulic mount without its fluid is nothing more than a hollow piece of rubber, its advanced damping capabilities completely lost.
Obvious Separation: In severe cases, you may be able to see a visible gap or complete separation between the two main parts of the mount. The metal bracket that bolts to the engine may no longer be connected to the bracket that bolts to the frame. This is a critical failure, and the vehicle should not be driven until the engine mounts are replaced.
Symptom 4: The Lurch of Engine Movement
This symptom is a direct physical manifestation of the others. Because the mount is no longer restraining the engine, the engine will physically move far more than it was designed to.
With the vehicle safely parked and the parking brake firmly applied, have an assistant stand in a safe position to observe the engine. While you firmly hold the brake pedal, briefly shift the transmission from Drive to Reverse. A small amount of engine movement (perhaps an inch or so) is normal. However, if the engine violently lurches, lifts, or twists by several inches, it is a definitive sign of at least one failed mount. This excessive movement is what causes the "clunking" noises and is the root cause of potential secondary damage to other components. What your assistant is seeing is the engine's torque being completely unopposed by a failed mount. This test should be performed with extreme caution, but it is one of the most conclusive diagnostic methods available outside of a professional workshop.
The Diagnostic Deep Dive: Confirming the Need for Replacement
Identifying the symptoms of a failing engine mount is the first critical step. However, before committing to a potentially labor-intensive repair, it is wise to perform a more thorough diagnosis to confirm the problem and rule out other possibilities. Automotive diagnosis is a process of elimination, akin to a doctor diagnosing an illness. A collection of symptoms points toward a likely cause, but further tests are needed to be certain. Rushing to a conclusion can lead to replacing the wrong part, wasting both time and money. A methodical approach ensures that when the decision is made to have the engine mounts replaced, it is the correct one.
The "Power Brake" Test: A Practical Field Diagnostic
This is a classic and effective technique used by mechanics to quickly assess the condition of engine and transmission mounts. It deliberately puts the engine under load while the vehicle is stationary, making any excessive movement easy to spot. This test requires a high degree of caution and should only be performed in an open area, clear of any people or obstacles.
- Preparation: You will need a trusted assistant for this test. The assistant's only job is to stand at a safe distance to the side of the vehicle (never in front or behind) and watch the engine. Ensure the hood is open.
- Positioning: The driver should be securely in the vehicle with the doors closed. Start the engine and let it settle to a normal idle.
- Execution (Forward Load): Press down firmly on the brake pedal with your left foot. This is non-negotiable and must be maintained throughout the test. Shift the transmission into Drive. With your left foot still hard on the brake, gently and briefly press the accelerator with your right foot, just enough to raise the engine RPM slightly (to around 1,200-1,500 RPM). Do not rev the engine excessively.
- Observation: Your assistant should be watching the engine block. A healthy set of mounts will allow the engine to twist or lift slightly, perhaps an inch (2-3 cm). A failed mount will allow the engine to lurch violently upwards or sideways by several inches.
- Execution (Reverse Load): Release the accelerator and, while still holding the brake, shift to Neutral, then to Reverse. Repeat the process, gently applying the accelerator while holding the brake.
- Observação (inversa): Your assistant should again observe the engine's movement. The engine will now try to twist in the opposite direction. Excessive movement in this direction often points to a different mount than the one that failed under forward load (e.g., the front mount may be stressed in Drive, while a rear or transmission mount is stressed in Reverse).
This test effectively simulates the forces of acceleration and deceleration, making a bad mount's weakness immediately apparent. The dramatic lurch of the engine is the confirmation you are looking for.
A Professional's Perspective: Leveraging Tools and Expertise
While the power brake test is highly indicative, a professional mechanic has additional methods to achieve a 100% certain diagnosis. Their experience allows them to distinguish between normal movement and the specific signature of a failed part.
The Pry Bar Method: This is the most direct hands-on approach. With the vehicle on a lift for clear access, a mechanic will use a long pry bar to gently apply leverage between the engine bracket and the vehicle's frame near the mount. They are not trying to bend anything; they are simply feeling for "slop" or excessive play. A good mount will feel firm and resistant. A failed mount will allow for significant movement, often accompanied by a clunking sound as the separated parts make contact. The mechanic can perform this on each mount individually to pinpoint exactly which one has failed.
Stethoscope and Sensory Input: A mechanic's stethoscope is not just for finding engine noises. It can be used to listen to the mounts themselves. By placing the probe on the mount's bracket while the engine is running and being put under slight load, a mechanic can hear the internal stress or impact within the mount. They also rely on their hands. By placing a hand on the fender or frame, they can feel the nature of the vibration and often tell if it's the low-frequency rumble of a bad mount or the high-frequency buzz of a different issue.
Differentiating from Other Culprits: Is It Really the Mounts?
Several other common vehicle problems can produce symptoms—especially noises and vibrations—that are easily mistaken for a failed engine mount. A careful diagnostic process involves considering and eliminating these other possibilities.
Transmission Mounts: The transmission mount performs a similar function for the transmission. Its failure can also cause clunking noises on shifting and excessive vibration. Often, engine and transmission mounts are replaced as a set, as the failure of one puts extra strain on the others. A professional will inspect all driveline mounts.
Exhaust System Issues: A loose or broken exhaust hanger, a cracked manifold, or a failing flexible pipe can all cause significant rattling, clunking, and vibration that can feel like it's coming from the engine. The sounds are often most prominent at certain RPMs. A thorough visual inspection of the entire exhaust system from the engine to the tailpipe is necessary to rule this out.
Suspension Components: Worn control arm bushings, bad ball joints, or failing sway bar links can cause clunking noises, particularly when going over bumps or turning. However, these noises are typically tied to suspension movement rather than engine load. If the noise happens when you hit a pothole but not when you rev the engine in Park, the suspension is a more likely culprit. The general importance of suspension components is highlighted even in heavy machinery contexts, where they are vital for safe and efficient operation [kaihuacasting.com].
Driveshaft and CV Joints: On rear-wheel or all-wheel-drive trucks, worn universal joints (U-joints) or constant velocity (CV) joints in the driveshaft can cause a distinct clunk when shifting into gear or a vibration that changes with vehicle speed. This is often confused with a mount issue, but a key differentiator is that a driveshaft vibration is road-speed dependent, while an engine mount vibration is engine-speed dependent.
By systematically working through these diagnostic steps, from simple observation to specific tests, you can move from a suspicion to a certainty. This ensures that the effort and expense of getting your engine mounts replaced is a direct and effective solution to the problem, restoring the vehicle's stability and quiet operation.
The Crossroads of Choice: Selecting the Right Replacement Engine Mounts
Once the diagnosis is confirmed, you arrive at a critical decision point: which replacement mounts should you choose? This is not a one-size-fits-all answer. The ideal choice depends on a careful consideration of your truck's primary use, your performance expectations, your tolerance for NVH (Noise, Vibration, and Harshness), and your budget. The market offers a spectrum of options, from direct factory replacements to high-performance aftermarket upgrades. Making an informed choice at this stage is just as important as the diagnosis itself, as the parts you select will define the vehicle's character for many thousands of miles to come.
OEM vs. Aftermarket: A Cost-Benefit Analysis
This is the foundational choice for nearly any automotive part replacement. OEM (Original Equipment Manufacturer) parts are made by the same company that supplied them to the truck manufacturer for the assembly line. Aftermarket parts are made by other companies and are designed to be compatible replacements.
| Caraterística | OEM (Fabricante de Equipamento Original) | Pós-venda de alta qualidade |
|---|---|---|
| Fit and Finish | Guaranteed to be an exact match for the original part. | Generally very good, but minor variations can occasionally occur. |
| Desempenho | Designed to restore the vehicle's original ride and handling characteristics. | Can offer options to enhance performance (e.g., polyurethane) or match OEM. |
| Material Quality | Meets the vehicle manufacturer's specific engineering standards. | Quality can vary widely, from exceeding OEM standards to falling short. |
| Garantia | Typically backed by the vehicle manufacturer's parts warranty. | Warranty varies by brand, some offer excellent lifetime warranties. |
| Price | Generally the most expensive option. | Often significantly more affordable than OEM. |
| Availability | Primarily available through dealership parts departments. | Widely available from auto parts stores, online retailers, and repair shops. |
The Case for OEM: If your primary goal is to return the truck to its exact factory condition, OEM is the safest bet. The part is engineered by the people who designed the entire vehicle, ensuring a perfect match for the intended balance of comfort, performance, and durability. For a truck still under warranty, using OEM parts is often a requirement. The peace of mind that comes with a guaranteed fit and factory-spec performance is what you are paying a premium for.
The Case for High-Quality Aftermarket: The aftermarket is not a monolith; it ranges from budget brands to premium engineering firms. A reputable aftermarket manufacturer, such as those specializing in suportes de motor de substituição de alta qualidade, often has the advantage of being able to analyze the failures of the original OEM part and improve upon the design. They might use a more durable rubber compound or a slightly modified construction to enhance longevity. For an older vehicle, a quality aftermarket part can offer performance that is equal to or even better than the original, at a fraction of the cost. The key is to choose a trusted brand known for its quality control and materials science, avoiding the "too good to be true" cheap options that may fail prematurely.
The Material Dilemma: Rubber vs. Polyurethane
This choice directly impacts the driving experience. It's a fundamental trade-off between comfort and performance.
Rubber: As discussed, this is the material of choice for most manufacturers. Its natural elasticity and damping properties make it exceptionally good at absorbing the fine vibrations that lead to cabin noise and harshness. It is the choice for a smooth, quiet, and comfortable ride. Think of it like the cushioned insole of a running shoe—it's designed to absorb impact and provide comfort over long distances. However, rubber is susceptible to degradation from heat and oil, and its softness allows for more engine movement than some performance-oriented drivers prefer.
Polyurethane (Poly): This is a synthetic polymer that is far stiffer and more resistant to chemicals and heat than rubber. When used in an engine mount, it drastically reduces engine flex. This has two main benefits:
- Improved Throttle Response: With less "slop" in the driveline, more of the engine's power is transferred instantly to the wheels, making the truck feel more responsive.
- Enhanced Durability: Polyurethane is exceptionally tough and is less likely to break down, tear, or become saturated with oil. It's a fit-and-forget solution for many applications.
The significant downside is a dramatic increase in NVH. Because the material is so stiff, it transmits far more of the engine's vibrations directly into the chassis. The driver will feel more vibration through the steering wheel and seat, and the cabin will be noticeably louder. For a dedicated work truck, a tow vehicle, or an off-road rig where durability and power transfer are the absolute priorities, polyurethane is often the superior choice. For a daily-driven truck where long-distance comfort matters, the added NVH could become tiresome. It's like swapping the cushioned running shoe for a stiff hiking boot—you get more support and durability on rough terrain, but you feel more of the ground beneath your feet.
Understanding Mount Types: Solid, Hydraulic, and Active Mounts
Beyond the basic material, you must also select the correct type of mount for your vehicle's specific design.
- Suportes sólidos: These are essentially solid blocks of rubber or polyurethane. They are simple, durable, and cost-effective. If your truck came with solid mounts, you should replace them with the same, unless you are making a conscious decision to upgrade to polyurethane for performance reasons.
- Suportes hidráulicos: If your truck was originally equipped with hydromounts, it is highly recommended to replace them with new hydraulic units. These are tuned to cancel specific frequencies unique to your truck's engine and chassis combination. Replacing a sophisticated hydraulic mount with a simple solid rubber mount will almost certainly result in a noticeable increase in vibration, particularly at idle. While it might "fit," it will not perform the same function, and the vehicle's refinement will be compromised.
- Active Mounts: For vehicles with electronically controlled active mounts, there is little choice but to replace them with the correct OEM or equivalent active unit. These mounts are an integrated part of the vehicle's electronic systems. Installing a passive mount in its place would trigger fault codes in the ECU and would completely eliminate the benefits of the active damping system. The replacement is expensive, but it is the only way to restore the vehicle's intended function.
The process of selecting a replacement is an exercise in matching the part to the purpose. It requires an honest assessment of your needs and priorities. By carefully weighing the options—OEM vs. aftermarket, rubber vs. polyurethane, and the correct technological type—you ensure that the new parts will not just fix the problem but will also align perfectly with how you use and experience your truck.
O processo de substituição: Um guia concetual passo a passo
Replacing engine mounts is a job that falls into an intermediate-to-advanced category of automotive repair. It involves supporting the full weight of the engine, working in potentially tight spaces, and correctly torquing critical fasteners. While many experienced home mechanics can tackle the job, it is paramount to understand the conceptual flow and the safety precautions involved. For most truck owners, this guide is intended to demystify what their mechanic will be doing, allowing them to have an informed conversation about the process. This is not a direct substitute for a vehicle-specific service manual, which should always be the ultimate authority.
Preparation and Safety First: Gearing Up for the Job
Proper preparation is the foundation of any successful and safe repair. A rushed or ill-equipped approach is a recipe for disaster.
- Stable Ground and Support: The vehicle must be parked on a flat, level, solid surface. Never attempt this kind of work on soft ground or an incline. The vehicle should be secured with heavy-duty jack stands rated for the truck's weight. A floor jack alone is never a safe support for working under a vehicle.
- Calço as rodas: Place wheel chocks behind the rear wheels to prevent any possibility of the truck rolling.
- Disconnect the Battery: Before starting work, disconnect the negative terminal of the battery. This prevents any accidental electrical shorts and is a critical safety step.
- Gather Your Tools: The specific tools will vary by truck model, but a typical job requires a comprehensive socket and ratchet set with various extensions and universal joints, a set of wrenches, a torque wrench, a pry bar, and the necessary engine support equipment. Having everything ready beforehand prevents interruptions and frustration.
Supporting the Engine: The Foundational Step
This is the most critical phase of the entire process. You cannot simply unbolt an engine mount; the engine must be securely supported first. If it is not, it can shift or fall, causing catastrophic damage and posing a severe safety risk.
There are two primary methods for supporting the engine:
- Engine Hoist (or Engine Support Bar): This is the preferred professional method. An engine hoist (cherry picker) or an engine support bar that spans across the engine bay from fender to fender is used. A chain is attached to the engine's designated lift points. The hoist is then used to take up the full weight of the engine, lifting it just slightly (a few millimeters) to take the pressure off the mounts. This method provides excellent stability and control.
- Floor Jack and Wood Block: This is a common method for DIYers. A heavy-duty floor jack is positioned under the engine's oil pan. A block of wood (a piece of 2×4 or 2×6) must be placed between the jack pad and the oil pan. The wood distributes the load and prevents the jack from cracking the relatively fragile aluminum or steel oil pan. The jack is then raised just enough to support the engine's weight. It is crucial to be gentle and to ensure the jack is stable. This method is effective but offers less stability than a hoist.
Removing the Old Mounts: Access and Extraction
With the engine securely supported, the process of removing the old, failed mounts can begin.
- Access the Fasteners: This can often be the most challenging part of the job. Engine bays in modern trucks are crowded. It may be necessary to remove other components—such as the air intake box, splash shields, or even the front wheels—to gain access to the mount's bolts.
- Loosen the Bolts: There are typically two sets of bolts or nuts for each mount: those that secure the mount to the vehicle's frame or subframe, and a central "through-bolt" or nuts that secure the mount to a bracket on the engine block itself.
- Raise or Lower the Engine: It is often necessary to slightly raise or lower the supported engine by a small amount to align the bolts for removal. For example, once the frame bolts are out, you might need to lift the engine a half-inch to pull the mount's stud out of the frame. This is where the fine control of an engine hoist is particularly valuable.
- Extract the Mount: Once all fasteners are removed, the old mount can be maneuvered out of the engine bay. This may require some twisting and turning to clear surrounding components. This is a good time to inspect the old mount closely to confirm the failure mode—was it torn rubber, a leak, or a complete separation?
Installation and Alignment: Ensuring a Perfect Fit
Installing the new mount is the reverse of removal, but with a greater emphasis on precision and procedure. The goal is to install the new part without putting it under any preload or stress.
- Position the New Mount: Maneuver the new mount into position. Compare it one last time to the old one to ensure it is the correct part for the correct side (many mounts are side-specific).
- Hand-Thread All Bolts: Start all the bolts—both for the frame and the engine—by hand. Do not use power tools at this stage. This ensures that no bolts are cross-threaded, which could ruin the frame or engine block.
- The "No-Tension" Rule: Do not fully tighten any single bolt yet. Snug them up gently, but leave them loose enough that the mount can shift slightly. This allows the mount to settle into its natural, stress-free position.
- Lower the Engine: Slowly and carefully lower the engine back down so its full weight is resting on the new mounts. As you do this, watch to ensure the mount's bolts and studs align correctly with their respective holes.
- Torque to Specification: Now, with the engine's weight on the mounts, you can begin the final tightening sequence. Using a calibrated torque wrench, tighten each bolt to the exact specification listed in the vehicle's service manual. The torque sequence (the order in which you tighten the bolts) can also be important. Over-tightening can damage the bolts or the mount, while under-tightening can allow for movement and premature failure. This step is absolutely critical for the longevity and safety of the repair.
Once everything is torqued to spec, you can reinstall any components that were removed for access, reconnect the battery, and start the vehicle. The difference should be immediately noticeable: a smoother idle, an absence of clunking noises, and a restored sense of stability. Taking the truck for a gentle test drive will confirm that the operation was a success.
The Ripple Effect: 3 Common and Costly Mistakes to Avoid
The decision of when and how to have your engine mounts replaced is laden with consequences that extend far beyond a bumpy ride. Viewing failed mounts as a low-priority issue is a significant miscalculation. The engine's uncontrolled movement creates a cascade of stress throughout the vehicle, initiating a domino effect of secondary failures. Understanding these three common mistakes can mean the difference between a routine maintenance expense and a cascade of complex, costly repairs.
Mistake 1: Ignoring Early Warning Signs
This is by far the most common and most damaging mistake. The clunks and vibrations are not just annoyances; they are urgent communications from your vehicle. Ignoring them allows the underlying problem to fester and metastasize.
The Cascade of Failure: An engine that is lurching and vibrating excessively puts immense strain on every single component connected to it.
- Coolant Hoses and Radiator: The engine's violent movement can stretch, pull, and abrade coolant hoses. A hose rubbing against the chassis can wear through, causing a sudden and massive coolant leak. The twisting force can also put direct stress on the radiator's inlet and outlet necks, potentially cracking the plastic end tanks and leading to radiator failure. A sudden loss of coolant can cause the engine to overheat catastrophically in a matter of minutes, a repair that can cost thousands of dollars.
- Sistema de escape: The exhaust manifold is bolted directly to the engine, while the rest of the exhaust system is hung from the chassis. The engine mounts are meant to absorb the flex between them. When a mount fails, the engine's movement can crack the expensive exhaust manifold or fracture the flexible pipe located near the front of the system.
- Wiring Harnesses and Sensors: Modern engines are wrapped in complex wiring harnesses that connect to dozens of critical sensors. Excessive engine movement can stretch these wires, chafe their insulation, and damage the delicate connectors. This can lead to a host of mysterious electronic gremlins, check engine lights, and poor running conditions that are notoriously difficult and time-consuming to diagnose.
- Componentes do sistema de tração: The engine and transmission are a unit. A failed engine mount puts enormous stress on the transmission mount, causing it to fail prematurely. This combined movement can alter the angle of the driveshaft, leading to accelerated wear on the U-joints and potentially causing damaging vibrations throughout the drivetrain.
The cost of getting the engine mounts replaced is a fraction of the potential cost of repairing these secondary, consequential damages. Procrastination does not save money; it merely defers and multiplies the expense.
Mistake 2: Choosing the Wrong Type of Mount for Your Needs
As detailed earlier, not all mounts are created equal. Installing a mount that is inappropriate for the vehicle's application is a mistake that can compromise performance, safety, and driver comfort.
A Tale of Two Fleets (A Case Study): Imagine a fleet manager, Alex, responsible for two different fleets of trucks.
- Fleet A consists of light-duty trucks used for package delivery in urban environments. Drivers spend all day in these vehicles. To save money, Alex opts for cheap, solid polyurethane mounts when the originals wear out. The result? Driver complaints skyrocket. The increased vibration in the cabin is fatiguing and unpleasant. The constant, high-frequency shaking causes premature failure of dashboard electronics and light bulbs. While the mounts themselves are durable, the overall operating cost increases due to driver turnover and ancillary repairs.
- Fleet B consists of heavy-duty trucks used for hauling raw materials from a quarry. The work is punishing, and the loads are extreme. Here, Alex makes the informed decision to install high-quality polyurethane mounts. The result is positive. The polyurethane's durability withstands the harsh conditions, and its stiffness helps transfer power to the ground more effectively when pulling heavy loads up steep grades. The drivers in this context are more concerned with reliability than cabin comfort, and the choice is a perfect match for the application.
This illustrates the principle: the "best" mount is relative. Choosing a part based solely on price or a single attribute (like durability) without considering the holistic needs of the application is a strategic error.
Mistake 3: The DIY Pitfall of Improper Installation
While attempting the repair at home can be rewarding, a lack of knowledge or proper tools can lead to critical installation errors that are both dangerous and costly.
- Failure to Support the Engine Correctly: This is the cardinal sin of mount replacement. A story is told of a DIYer who, attempting to change a mount, supported the engine with a jack directly on the oil drain plug. The moment they started to unbolt the mount, the engine's weight shifted, shearing the drain plug and threads from the oil pan. The engine dropped, and the entire contents of the oil pan emptied onto the garage floor. The "simple" mount replacement job instantly became an expensive oil pan replacement, all due to an improper support point.
- Cross-Threading and Incorrect Torque: Rushing the installation and using power tools to drive in bolts can easily lead to cross-threading—forcing a bolt into threads that are not aligned. This can strip the threads in the engine block or the vehicle frame. Repairing these threads often requires specialized tools like a tap and die set or Helicoil inserts and can turn a two-hour job into a two-day ordeal. Similarly, failing to use a torque wrench is a common mistake. Under-tightened bolts can back out, causing the mount to fail, while over-tightened bolts can be stretched beyond their elastic limit, compromising their strength and risking a sudden fracture under load.
These three mistakes—procrastination, improper selection, and incorrect installation—form a triad of risk that can be entirely avoided through timely action, informed decision-making, and a respect for proper procedure.
Beyond the Mounts: A Holistic View of Vehicle Stability and Longevity
It is a common human tendency to view problems in isolation. When a truck develops a vibration, we seek the single "broken" part responsible. However, a modern vehicle is more accurately understood as a complex, interconnected system, much like a biological organism. The health of one part is intrinsically linked to the health of all others. The failure of a seemingly simple component like an engine mount sends ripples of dysfunction throughout this system. Adopting a more holistic philosophy toward maintenance is therefore not just good practice; it is essential for ensuring the long-term reliability and safety of any heavy vehicle.
The Interconnected System: How Mounts Affect Other Components
The engine and transmission form the heart of the powertrain. The suspension and undercarriage form the skeleton and legs that connect the vehicle to the ground. The engine mounts are the crucial link between these two major systems. When this link is compromised, the negative effects radiate outwards.
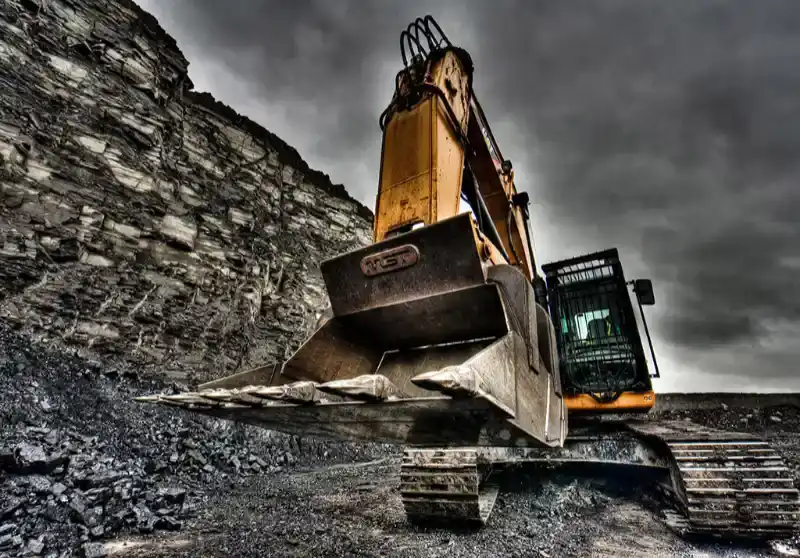
Consider the undercarriage of a heavy machine, like an excavator or bulldozer. The undercarriage—comprising track chains, rollers, and sprockets—accounts for a significant portion of the machine's total maintenance costs [teamexcavatorparts.com]. Its purpose is to provide a stable, mobile platform. Operators of such machinery understand that a failure in one roller puts additional stress on the others and on the track chain itself, accelerating wear across the entire system [itrpacific.com.au].
The same principle applies directly to a truck. A failed engine mount is like a broken roller on an excavator. It forces the other mounts (including the transmission mount) to bear more load and absorb more vibration than they were designed for, leading to their premature failure. This uncontrolled powertrain movement then transmits shock loads into the driveshaft and axles—components of the undercarriage system. The stability and mobility of the entire machine are compromised by a single point of failure, demonstrating that no part truly works in isolation. The selection of high-quality components, whether for an excavator's undercarriage or a truck's engine bay, is a foundational element of ensuring machine longevity (Mechandlink, 2026).
Proactive Maintenance as a Philosophy
This systemic view leads to a logical conclusion: maintenance should be proactive, not reactive. Reactive maintenance means waiting for a part to fail completely—the loud bang, the plume of steam, the sudden loss of power—before taking action. This is invariably the most expensive and most dangerous approach.
Proactive maintenance is a philosophy of prevention. It involves regular inspections, listening for changes in the vehicle's behavior, and addressing minor issues before they have a chance to escalate. It means understanding that the cost of getting your truck engine mounts replaced when they first show signs of wear is an investment, not an expense. It is an investment in preventing the far greater cost of a cracked radiator, a damaged wiring harness, or a failed transmission mount down the line.
This philosophy is the standard in industries like aviation, where the consequences of component failure are dire. It should be the standard for anyone who relies on a heavy vehicle for their livelihood or safety. It involves moving from a mindset of "if it ain't broke, don't fix it" to one of "let's ensure it never breaks in the first place."
The Economic Argument for Timely Repairs
A purely economic analysis provides a powerful argument for proactive replacement. Let's construct a hypothetical but realistic scenario:
Scenario: The Cost of Delay A long-haul truck driver notices a new vibration and a clunk when shifting gears. They suspect a bad engine mount but decide to "keep an eye on it" to avoid the downtime and cost of a repair, estimated at $600.
Two months later, while accelerating onto a highway, the weakened mount fails completely. The engine lurches violently, and the fan blade, now out of alignment, strikes the radiator, puncturing it. The engine's movement also pulls on a main coolant hose, tearing it from its fitting. Coolant pours out, and the engine begins to overheat rapidly. The driver is forced to pull over on a dangerous stretch of highway, requiring an expensive emergency tow.
The final repair bill includes:
- Emergency towing: $500
- Replacement of all engine mounts (now a necessity): $600
- New radiator: $800
- New fan shroud and fan clutch: $400
- Replacement coolant hoses and coolant: $200
- Labor for the extensive repairs: $1,000
- Total Cost: $3,500
On top of the monetary cost, the driver loses two days of work, representing thousands of dollars in lost revenue. The initial $600 investment to have the engine mounts replaced would have prevented this entire $3,500+ catastrophe. This is the stark economic reality of the ripple effect. The stability of the entire machine, from its core components to its operational efficiency, relies on the health of each part within the system (YNF Machinery, 2024). Viewing the truck as an interconnected whole transforms maintenance from a chore into a fundamental strategy for success and safety.
Perguntas frequentes (FAQ)
How much does it cost to get engine mounts replaced?
The cost can vary significantly based on the truck's make and model, the type of mounts required, and local labor rates. For a standard-duty truck using quality aftermarket rubber mounts, the cost might range from $400 to $800. For a heavy-duty truck or one requiring more complex hydraulic or active electronic mounts, the cost could be $1,000 or more. The price reflects both the cost of the parts and the labor involved, which can be substantial if the mounts are difficult to access.
Can I drive with a broken engine mount?
While it may be physically possible to drive the vehicle for a short period, it is strongly discouraged. A broken mount allows for excessive engine movement, which can cause a cascade of expensive secondary damage to coolant hoses, the radiator, exhaust components, and wiring. In a worst-case scenario, catastrophic failure could lead to a loss of vehicle control. It is a significant safety risk.
How long do engine mounts typically last?
The lifespan of an engine mount depends on the material, driving conditions, and environmental factors. As a general guideline, rubber mounts can last anywhere from 80,000 to 150,000 kilometers (approx. 50,000 to 94,000 miles). Mounts on trucks used for heavy towing or in harsh climates may wear out sooner. Polyurethane mounts generally have a longer lifespan due to their durability.
Are polyurethane engine mounts better than rubber?
"Better" is subjective and depends on your priorities. Polyurethane is more durable and provides better throttle response, making it ideal for performance, off-road, or heavy-hauling applications. However, it significantly increases the amount of noise and vibration felt in the cabin. Rubber provides a much smoother, quieter ride, making it the better choice for daily drivers and anyone prioritizing comfort.
What's the difference between an engine mount and a transmission mount?
They perform the same basic function but are located in different places. Engine mounts support the engine at various points in the engine bay. The transmission mount supports the rear of the transmission, where it connects to the driveshaft. Together, they form a complete system to hold the entire powertrain in place. The failure of an engine mount puts extra stress on the transmission mount, and vice-versa.
Will new engine mounts make my truck feel different?
Yes, and the change is almost always for the better. After having your engine mounts replaced, you should notice a significant reduction in vibration at idle and during acceleration. The cabin will be quieter, and the entire vehicle will feel "tighter" and more stable. The unsettling clunks and lurches will be gone, restoring the truck to its original smooth and controlled feel.
How can I make my new engine mounts last longer?
The best way is to ensure a quality installation with all bolts torqued to specification. Beyond that, avoiding aggressive driving (hard launches, abrupt acceleration) can reduce stress. Keeping the engine bay clean is also helpful, as prolonged exposure to leaking oil or other caustic fluids can degrade the rubber in the mounts, shortening their life.
Conclusão
The engine mount is a component of profound and understated importance, acting as the quiet mediator in the constant, violent struggle between the engine's power and the chassis's need for stability. Its health is not a trivial concern but a foundational pillar of the vehicle's overall performance, safety, and structural integrity. To understand the mount is to understand the truck as a dynamic, interconnected system where the failure of one part inevitably compromises the whole. Recognizing the subtle auditory and sensory clues of a failing mount is the first step in a chain of responsible ownership. This is followed by a deliberate and informed choice of replacement—a choice that must weigh the merits of material and design against the specific demands of the vehicle's intended use. Delaying this essential maintenance is a false economy, inviting a cascade of far more destructive and costly failures. Ultimately, the act of having engine mounts replaced is more than a simple repair; it is a reaffirmation of the principle of proactive care, an investment in longevity, and a restoration of the harmony between machine and operator.
Referências
Genta, G., & Morello, L. (2009). The automotive chassis: Volume 1: Components design. Springer Science & Business Media.
ITR Pacific. (2024, October 24). An in-depth guide to excavator undercarriage parts: Enhancing performance and durability with ITR Pacific. ITR Pacific. https://www.itrpacific.com.au/blogs/news/2024/Oct/24/excavator-undercarriage-parts-guide
Kaihua Casting. (2026, March 12). Comprehensive guide to semi truck front suspension parts and maintenance. https://www.kaihuacasting.com/news/comprehensive-guide-to-semi-truck-front-suspension-parts-and-maintenance.html
Mechandlink. (2026, March 2). How to identify and select high quality excavator undercarriage parts. https://www.mechandlink.com/en/news-article/How-to-identify-and-select-high-quality-excavator-undercarriage-parts
Team Excavator Parts. (2025, August 7). Complete guide to excavator undercarriage components.
YNF Machinery. (2024, December 15). Comprehensive guide to excavator undercarriage parts. https://www.ynfmachinery.com/comprehensive-guide-to-excavator-undercarriage-parts/